Add price lists from the Back Office to define the name of the list and select an optional template. To adjust the item prices, continue with editing price lists. Once created and modified, apply the price list to items on the POS.
To learn more about what price lists are, if you should use them, and how to activate this feature, visit our About price lists article.
Adding price lists
Add price lists from the Back Office to define the name of the list and select an optional template.
- Log in to the Back Office with your Lightspeed Restaurant credentials.
- From the navigation menu, select Menu management > Price lists.
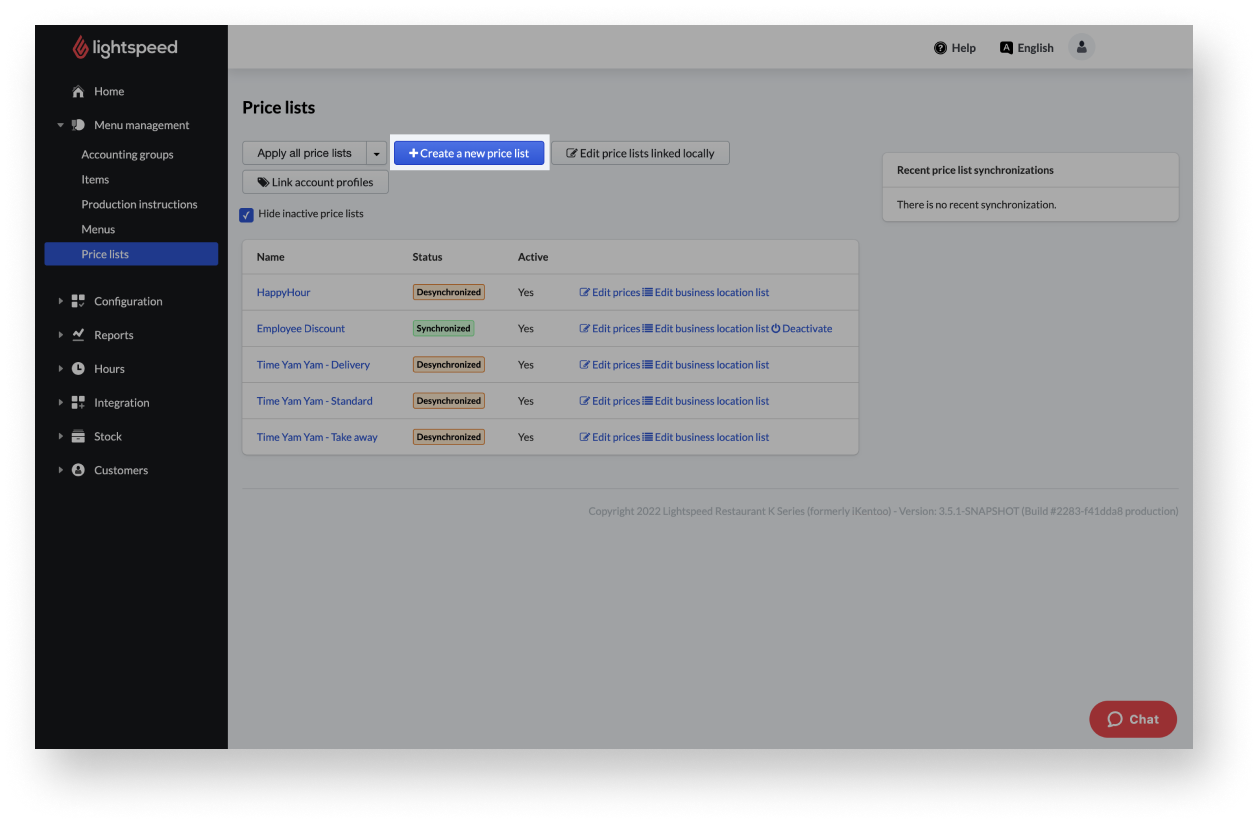
- Click Create a new price list.
- Enter a name for the price list.
- (Optional) Select an existing price list to use as a template from the drop-down menu.
- Click Save to add the price list to the Back Office.
- Continue with Editing price lists to adjust the item prices.
Editing price lists
After adding a price list in the Back Office, modify it to adjust the item prices. A single price list or multiple price lists can be edited and compared to see how new prices compare to standard prices. If you have several business locations, define the locations where the price list will be available.
Table of contents:
- Editing a single price list
- Editing and comparing multiple price lists
- Editing business location lists
Editing a single price list
The Edit price lists page shows all items in the Back Office listed in a table. Adjust the prices as they will be sold in your restaurant.
- Log in to the Back Office with your Lightspeed Restaurant credentials.
- From the main navigation menu, select Menu management > Price lists.
- Click Edit prices for the price list you want to edit.
- In the right column, adjust the prices as they will be sold in your restaurant. For items not affected by price changes, keep the price as-is.
- Click anywhere outside the price field to save the entry.
- Continue with Applying price lists to apply the price list to items on the POS.

Editing and comparing multiple price lists
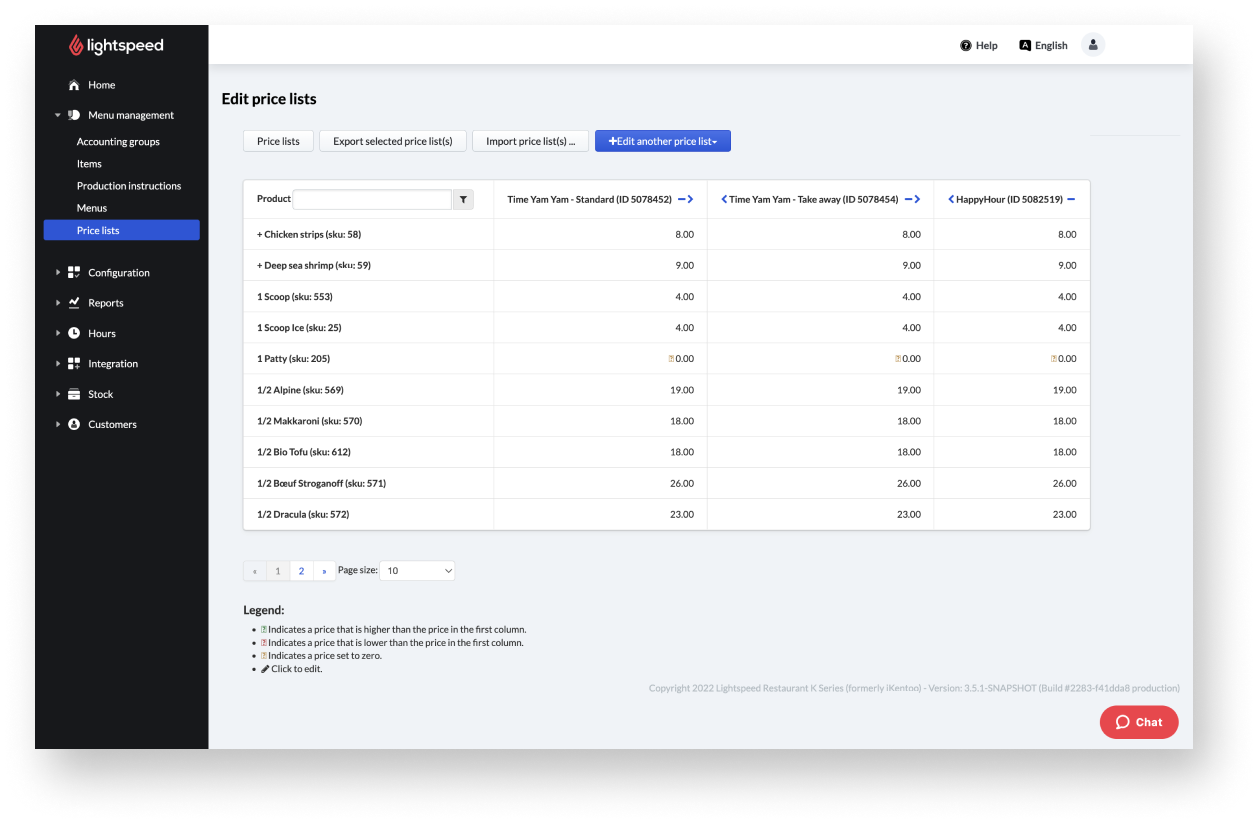
The Edit price lists page shows all items in the Back Office listed in a table. Add price lists to edit and compare multiple lists. Prices are compared from left to right and price changes are shown as up arrows (increased price) or down arrows (decreased price) next to corresponding price entries.
- Log in to the Back Office with your Lightspeed Restaurant credentials.
- From the main navigation menu, select Menu management > Price lists.
- Choose one of the following options to edit price lists:
- Click Edit prices for the price list you want to edit.
- Click Edit prices linked locally to only see price lists for the business location you are currently logged in to.
- Click +Edit another price list.
- Choose a price list from the drop-down menu. The price lists appear in additional columns on the right side of the table.
- (Optional) Repeat steps 4 and 5 to add additional price lists to the table.
- Adjust the prices in the appropriate price list columns.
- Click anywhere outside the price field to save the entry.
- (Optional) To remove price lists from the table, click – (minus).
- (Optional) To move columns, click < (left) or > (right).
- Continue with Applying price lists to apply price lists to items on the POS.
Editing business location lists
If you have multiple business locations, define the business location where the price list will be available.
- Log in to the Back Office with your Lightspeed Restaurant credentials.
- From the main navigation menu, select Menu Management > Price lists.
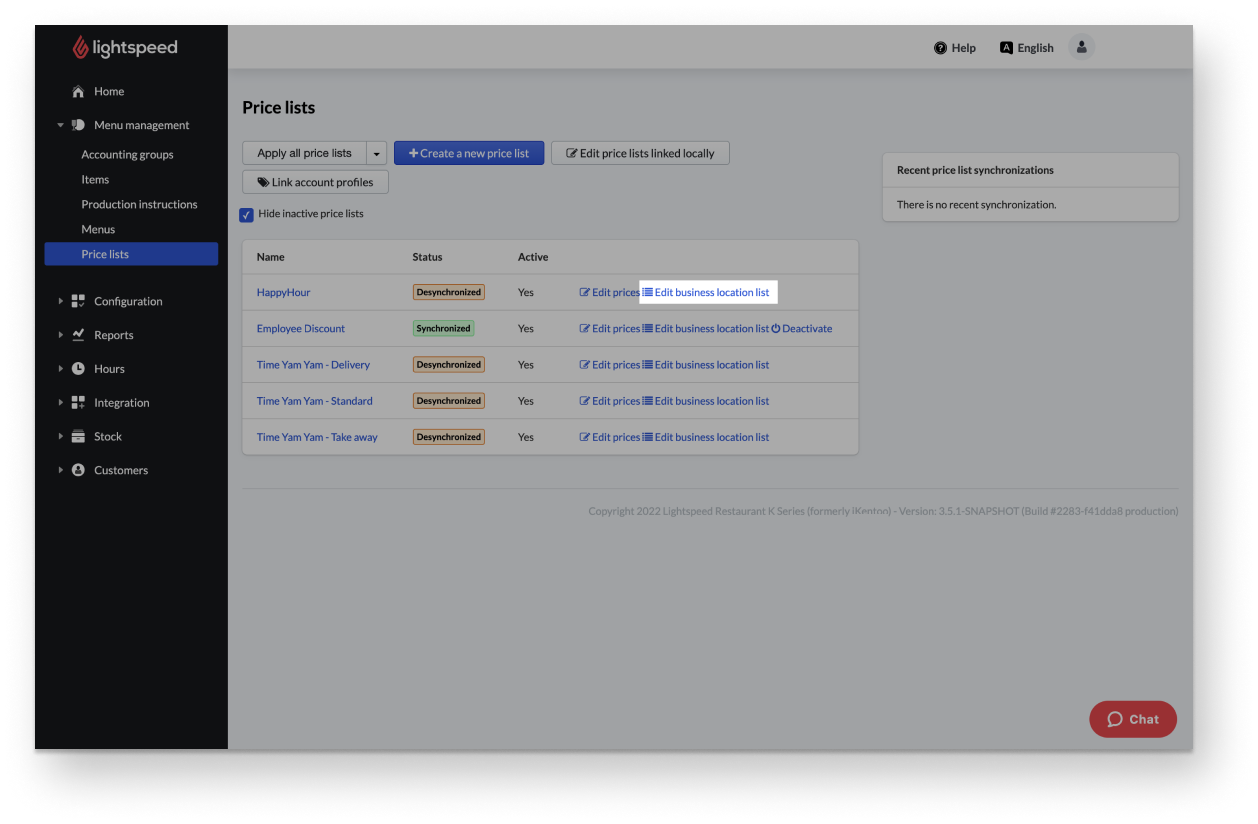
- Click Edit business location list.
- Enable business location(s) by choosing from the following options:
- Click Select all to enable all business locations.
- Click one or more business location button(s).
- (Optional) Click Invert selection to switch enabled business locations to disabled or the other way round.
- Click Save.
- Continue with Applying price lists to apply price lists to items on the POS.
Applying price lists
Once you've created a price list and defined new item prices, apply all price lists / all locally linked price lists to your devices so the new prices appear on items in the POS.
- Log in to the Back Office with your Lightspeed Restaurant credentials.
- From the main navigation menu, select Menu Management > Price lists.
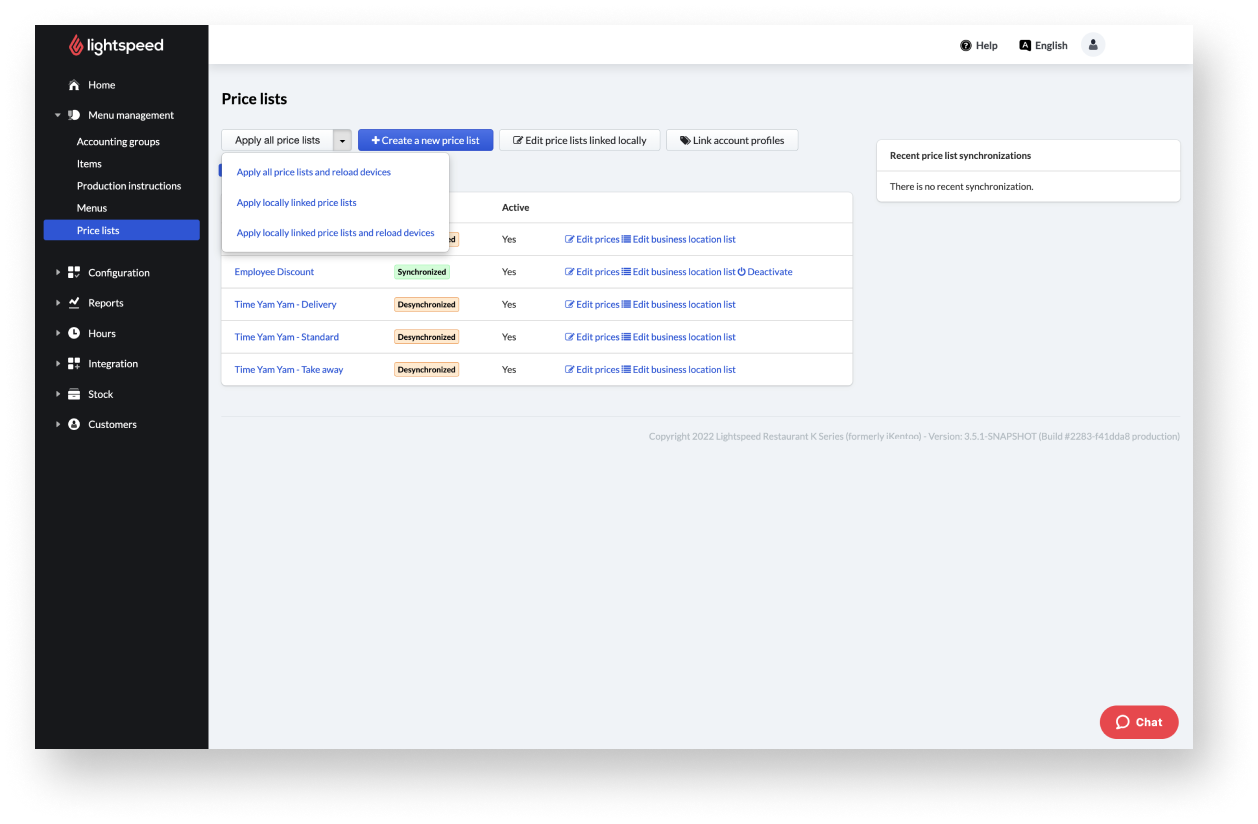
- Click Apply all price lists or select the arrow next to Apply all price lists and choose one of the options from the drop-down menu. See Applying price lists options for details.
- Wait for a green confirmation banner to appear, indicating the price list was successfully applied.
Applying price lists options
If there are several price lists, the price on the POS depends on which account profile is selected in the order.
| Option name | Description |
| Apply all price lists | Each price list is applied to the items listed in the Menu management > Items section of the Back Office. To apply the prices on the POS, manually reload devices. |
| Apply all price lists and reload device | Each price list is applied to the items listed in Menu management > Items of the Back Office and an automatic reload of the devices displays the new prices on the POS. |
| Apply locally linked price lists | Only price lists of the location currently logged in to the Back Office are applied to the items listed in the Menu management > Items section of the Back Office. To apply the prices on the POS, manually reload devices. |
| Apply locally linked price lists and reload devices | Only price lists of the location currently used in the Back Office are applied to the items listed in the Menu management > Items section of the Back Office and an automatic reload of the devices displays the new prices on the POS. |
What's next?
Link account profiles to price lists to apply the price list when a specific account profile is used at the POS.
If you already have existing price data in a CSV file, you can bulk add prices by importing the file or exporting price data from the Back Office into a CSV file for use outside the Back Office