There are various reasons that items can go to waste: expired ingredients, broken objects, or an issue caused by staff error. Use the Wastage feature to update stock levels when items are discarded or destroyed and keep track of waste reasons and the value of what was lost.
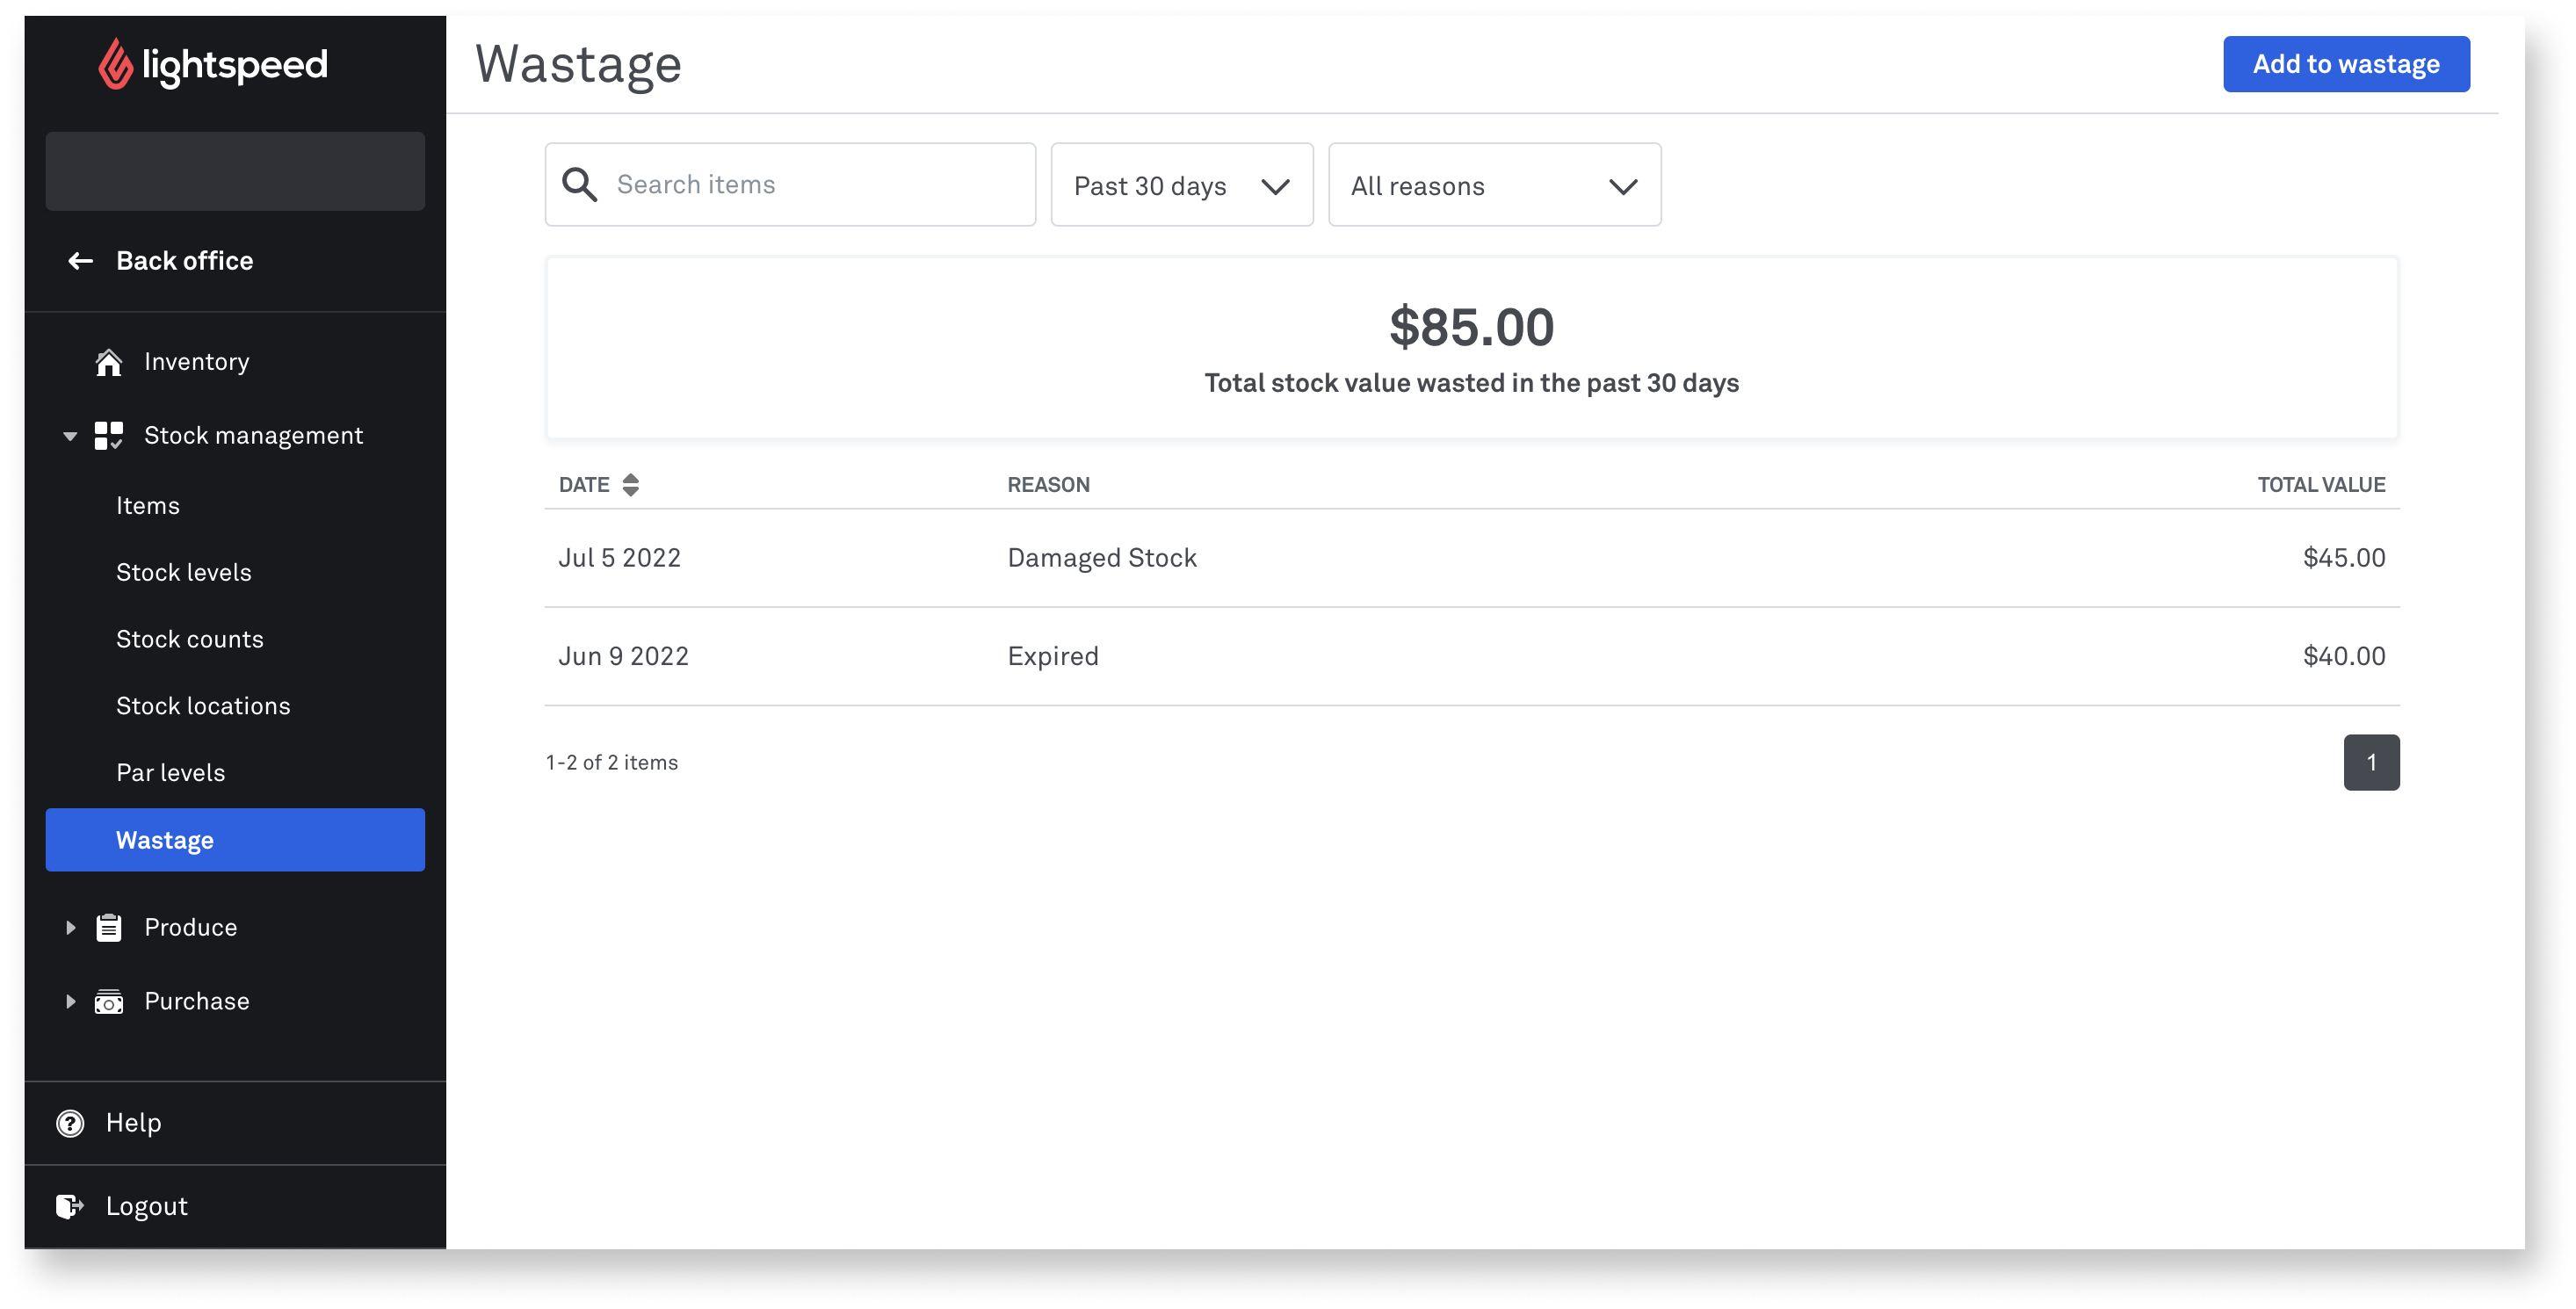
From the Wastage dashboard, you'll see an overview of waste events and the value of items contained within. Select an event to see additional Wastage details.
Accessing the Wastage dashboard
To visit the Wastage dashboard and see your lost items and their value:
- Log in to the Inventory module with your Lightspeed credentials.
- From the navigation menu, select Stock management > Wastage.
- (Optional) To filter results by date or waste reason, follow steps 3a–3b.
- From the first drop-down menu, select a date range (up to the past 12 months).
- From the second drop-down menu, select a specific waste reason or All reasons (default).
- (Optional) Look up specific items using the Search items field. Any waste events on the dashboard will contain the item you searched for.
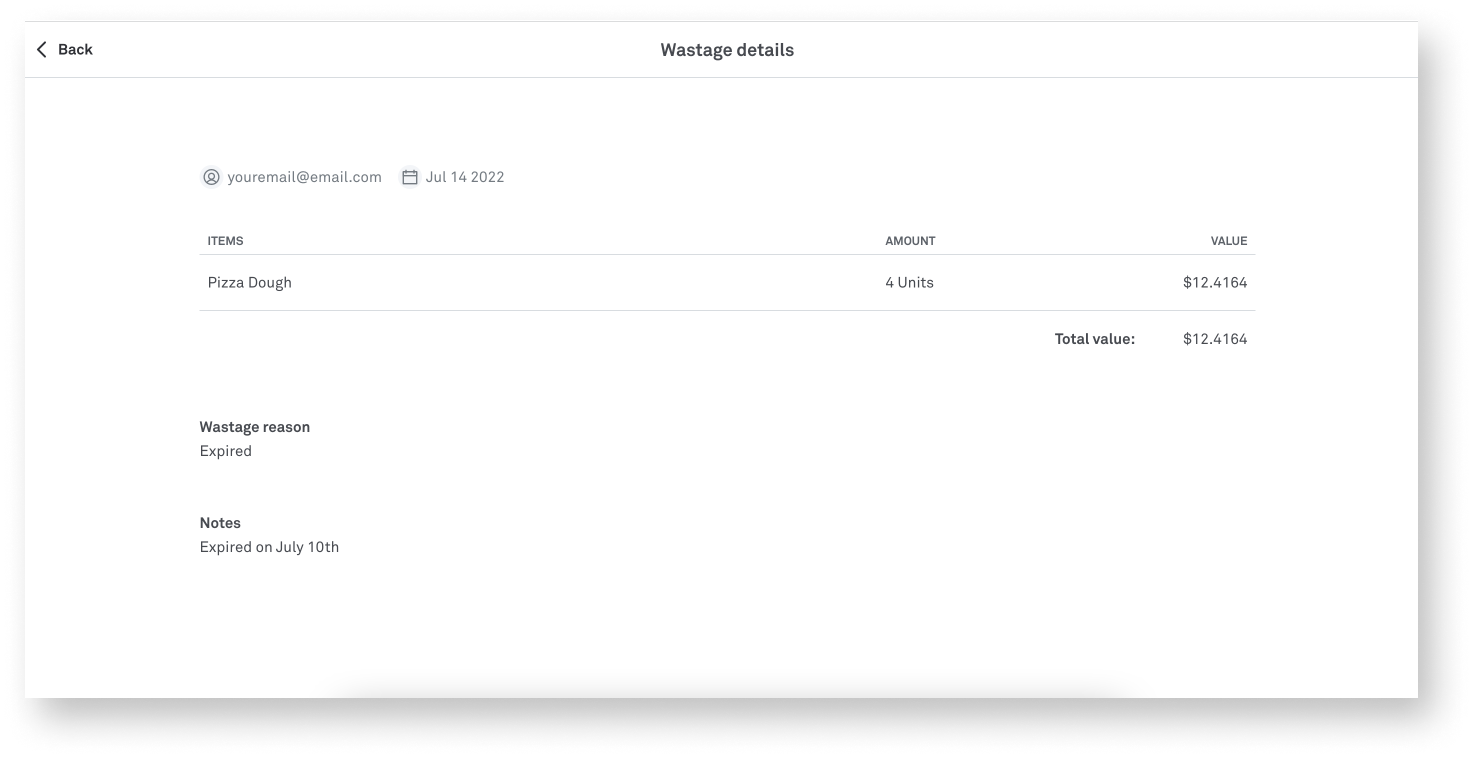
- (Optional) Click a specific waste event to see its details.
On the Wastage details page, you'll see the email of the user who created the event, the number of lost units, the value of those items, and any notes relating to the event.
Adding wastage events
Each time you add wastage, a new waste event will be created on the Wastage dashboard. When adding items to waste, you'll be able to enter information such as the amount, reason, and notes. The Total value of wastage will calculate automatically based on item prices as entered in Back Office. To learn how to change these prices, see our About items article
To add wastage:
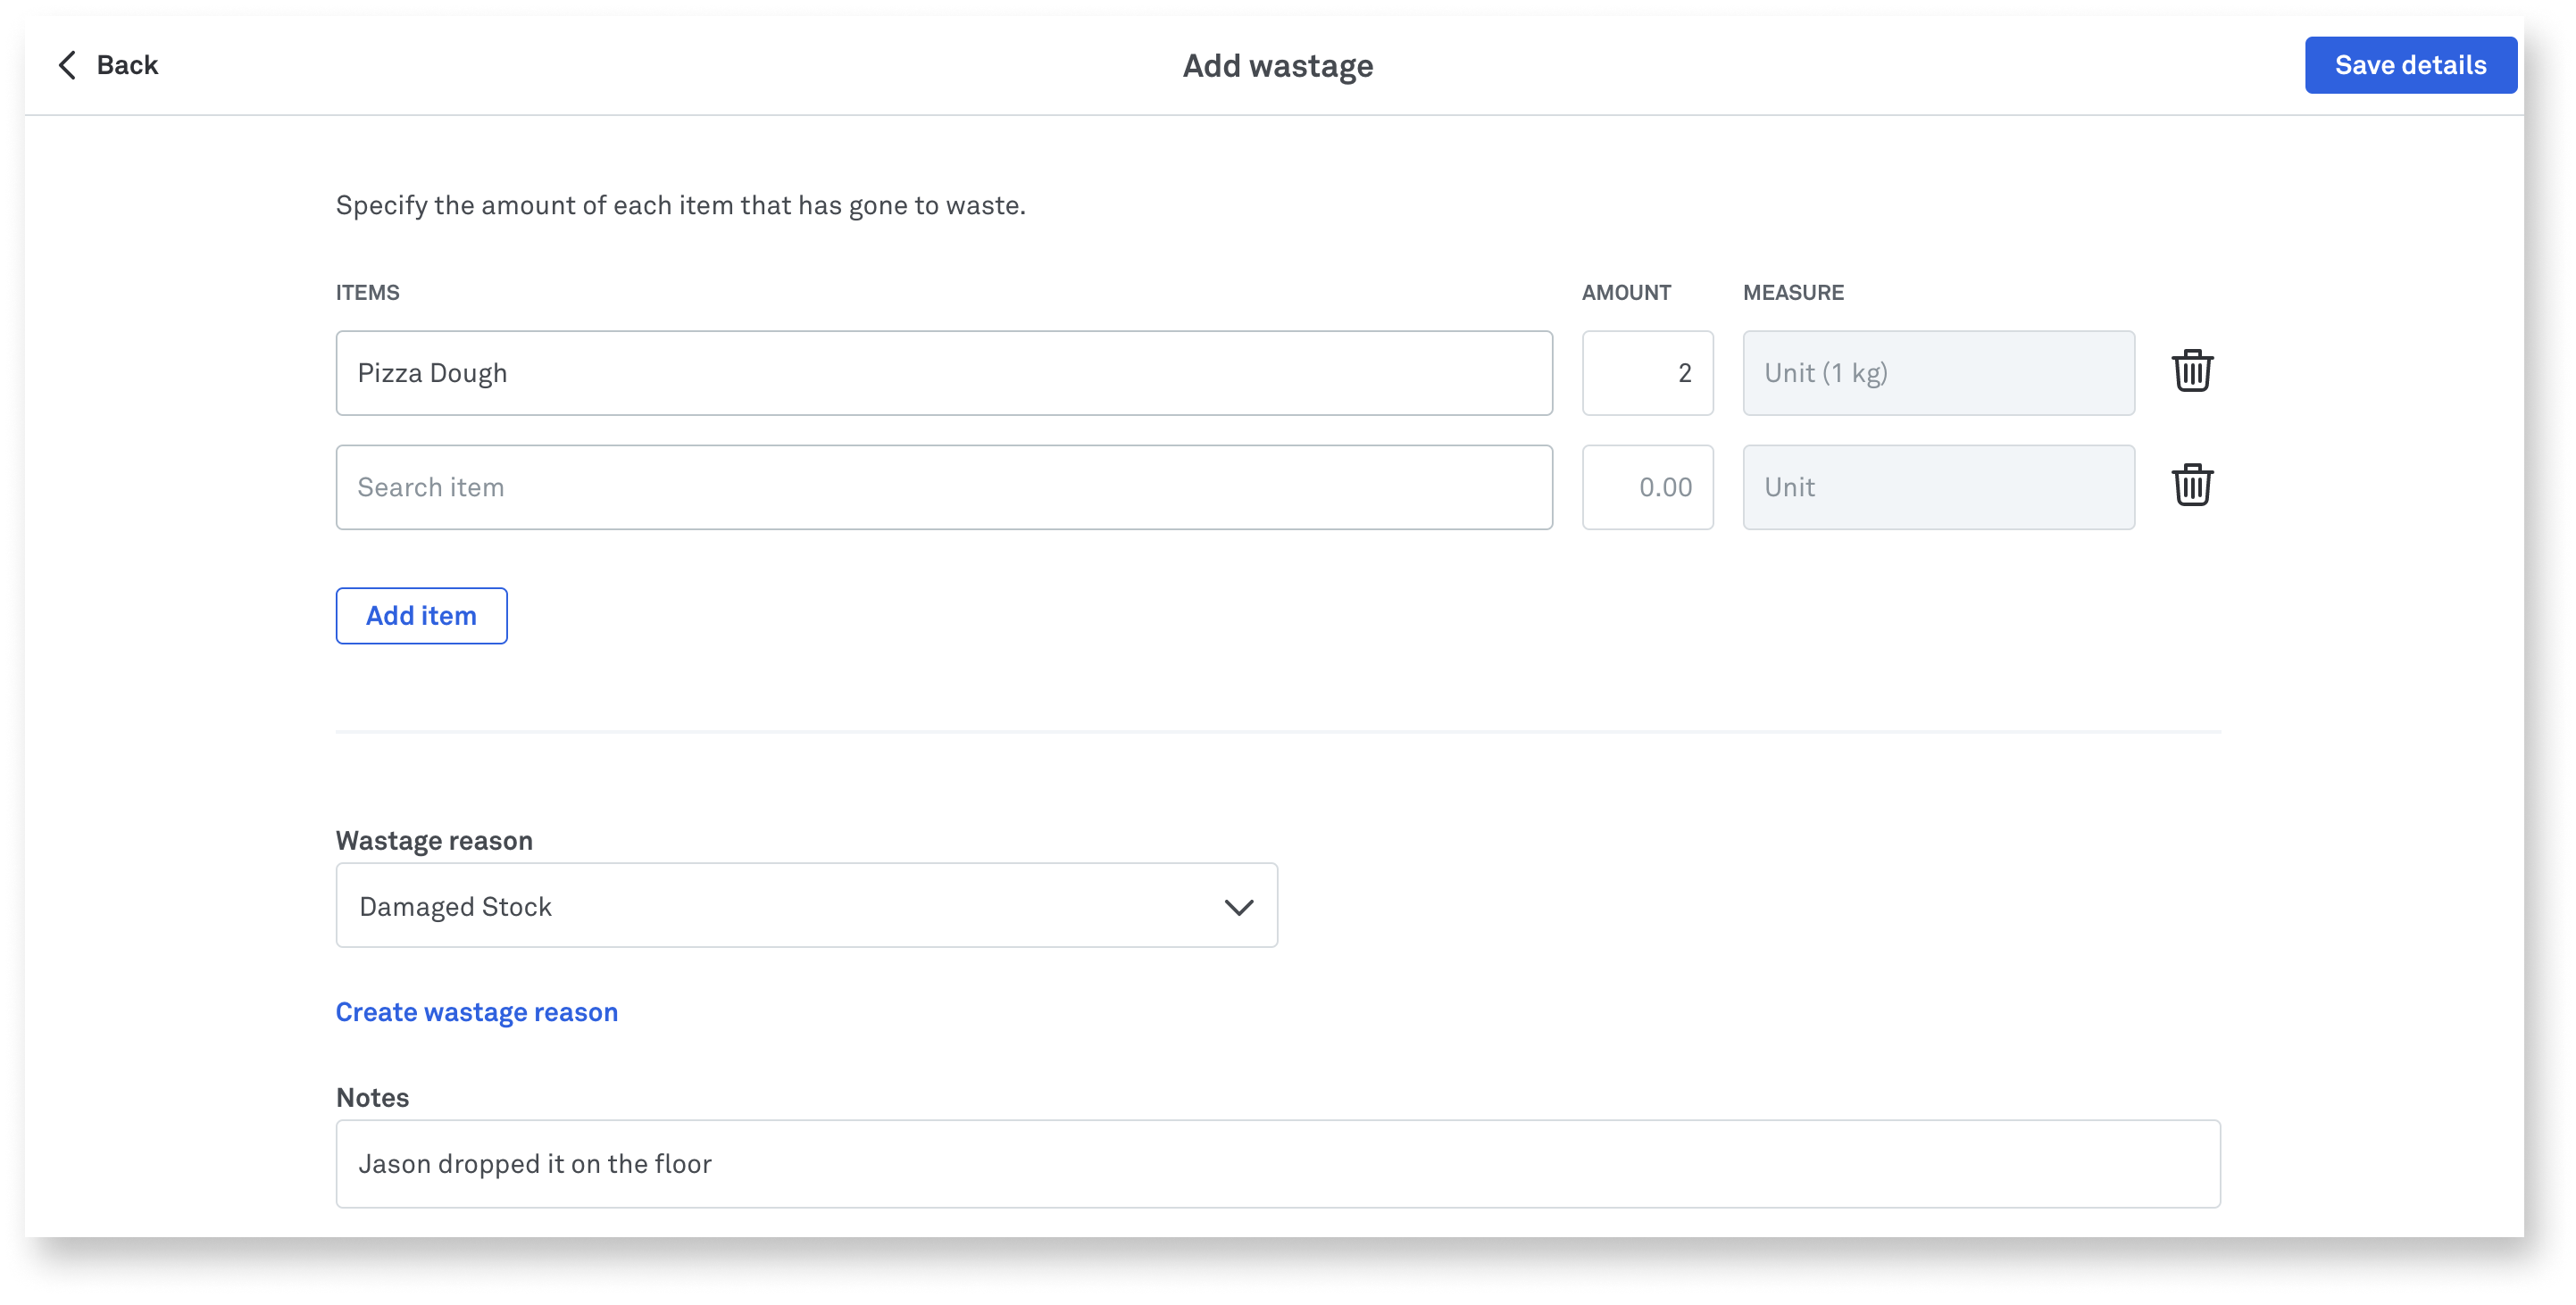
- From the Wastage dashboard, click Add to wastage.
- Using the Search item field, type the name of the item you want to add to the wastage event or select one from the drop-down menu.
- Enter the Amount that went to waste. The Measure field indicates the item's measurement type. To learn how to change an item's measurement, visit our About Items article.
- (Optional) To add other items, click Add items, then repeat steps 2-3 as needed in the new fields.
Note: This is best used when you lose multiple items from the same event. For example, when a half-made batch expires or is contaminated, enter all ingredients as individual lines and the amount lost.
- Select an existing Wastage reason from the drop-down menu, or create a new reason:
- Create a new reason by clicking Create wastage reason, naming it, and clicking Save to finish. Note: Wastage reasons cannot be removed or edited later.
- (Optional) Enter Notes to add more details about the wastage event.
- Click Save details to finish and update your inventory levels.