After splitting a check, you can always edit or revert the split check.
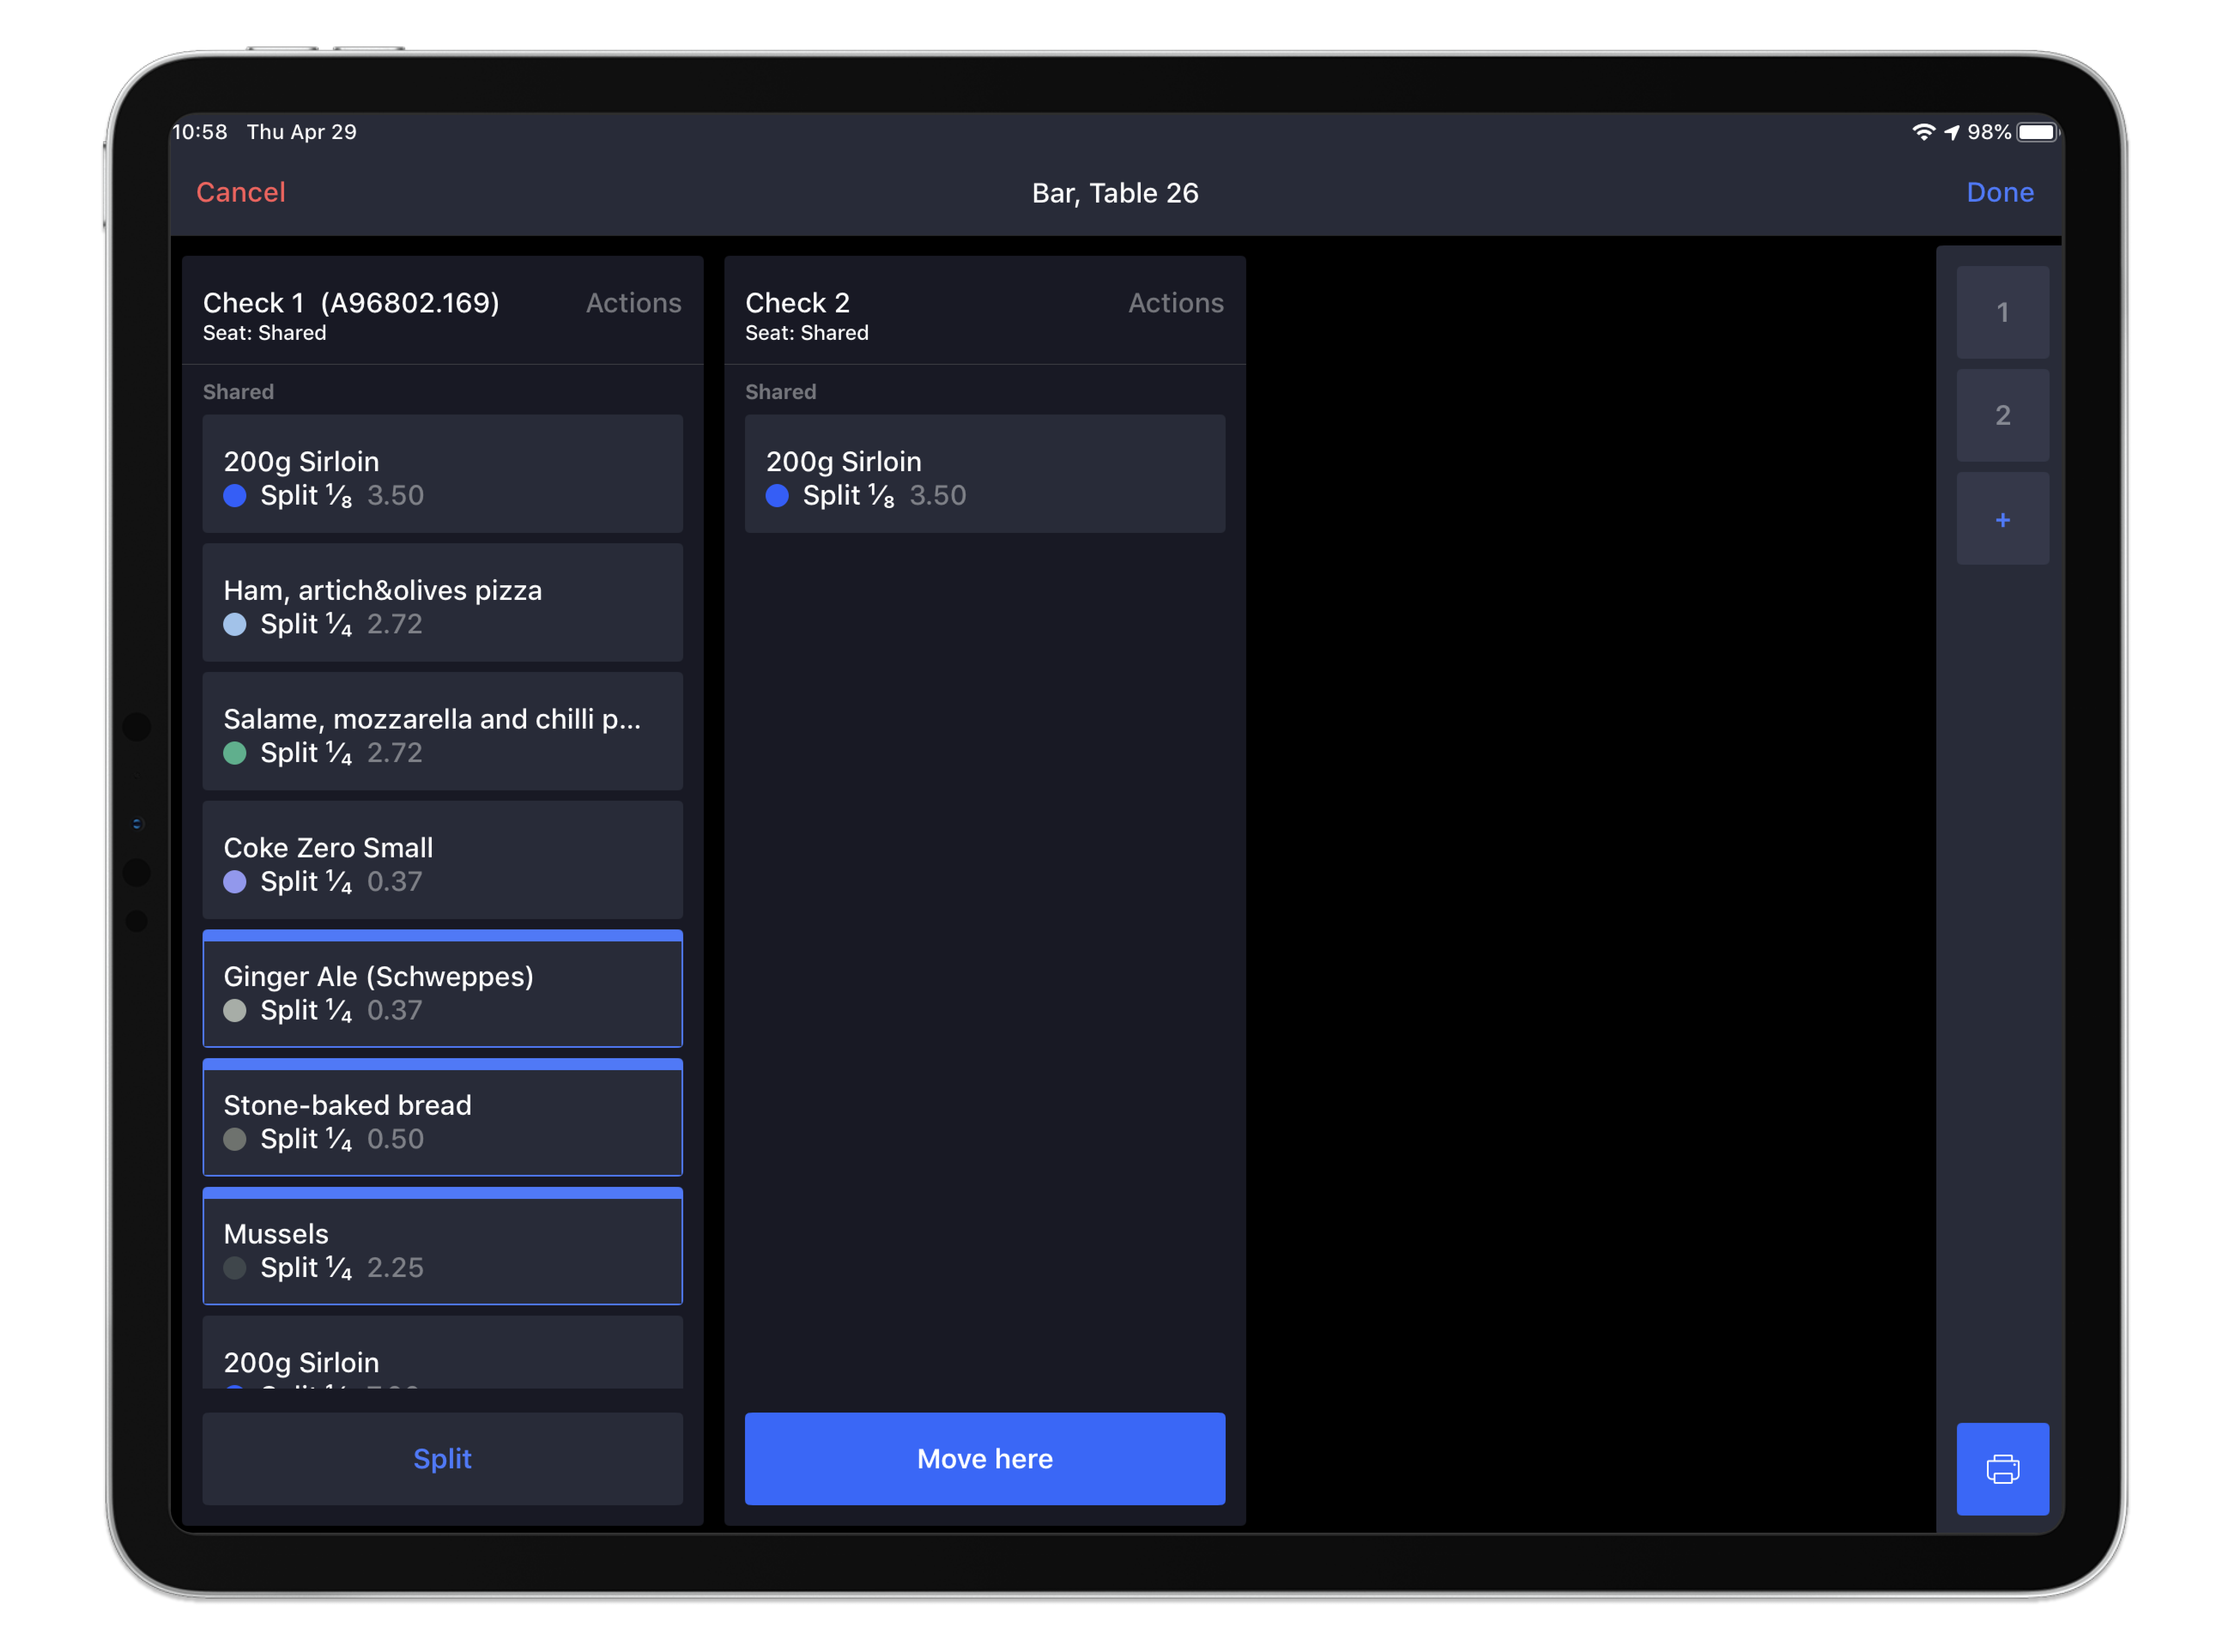
Move an order item to another check, by tapping an item and selecting the check you wish to push the item to. You'll notice the screen is very responsive, so moving items between checks is a quick and intuitive process.
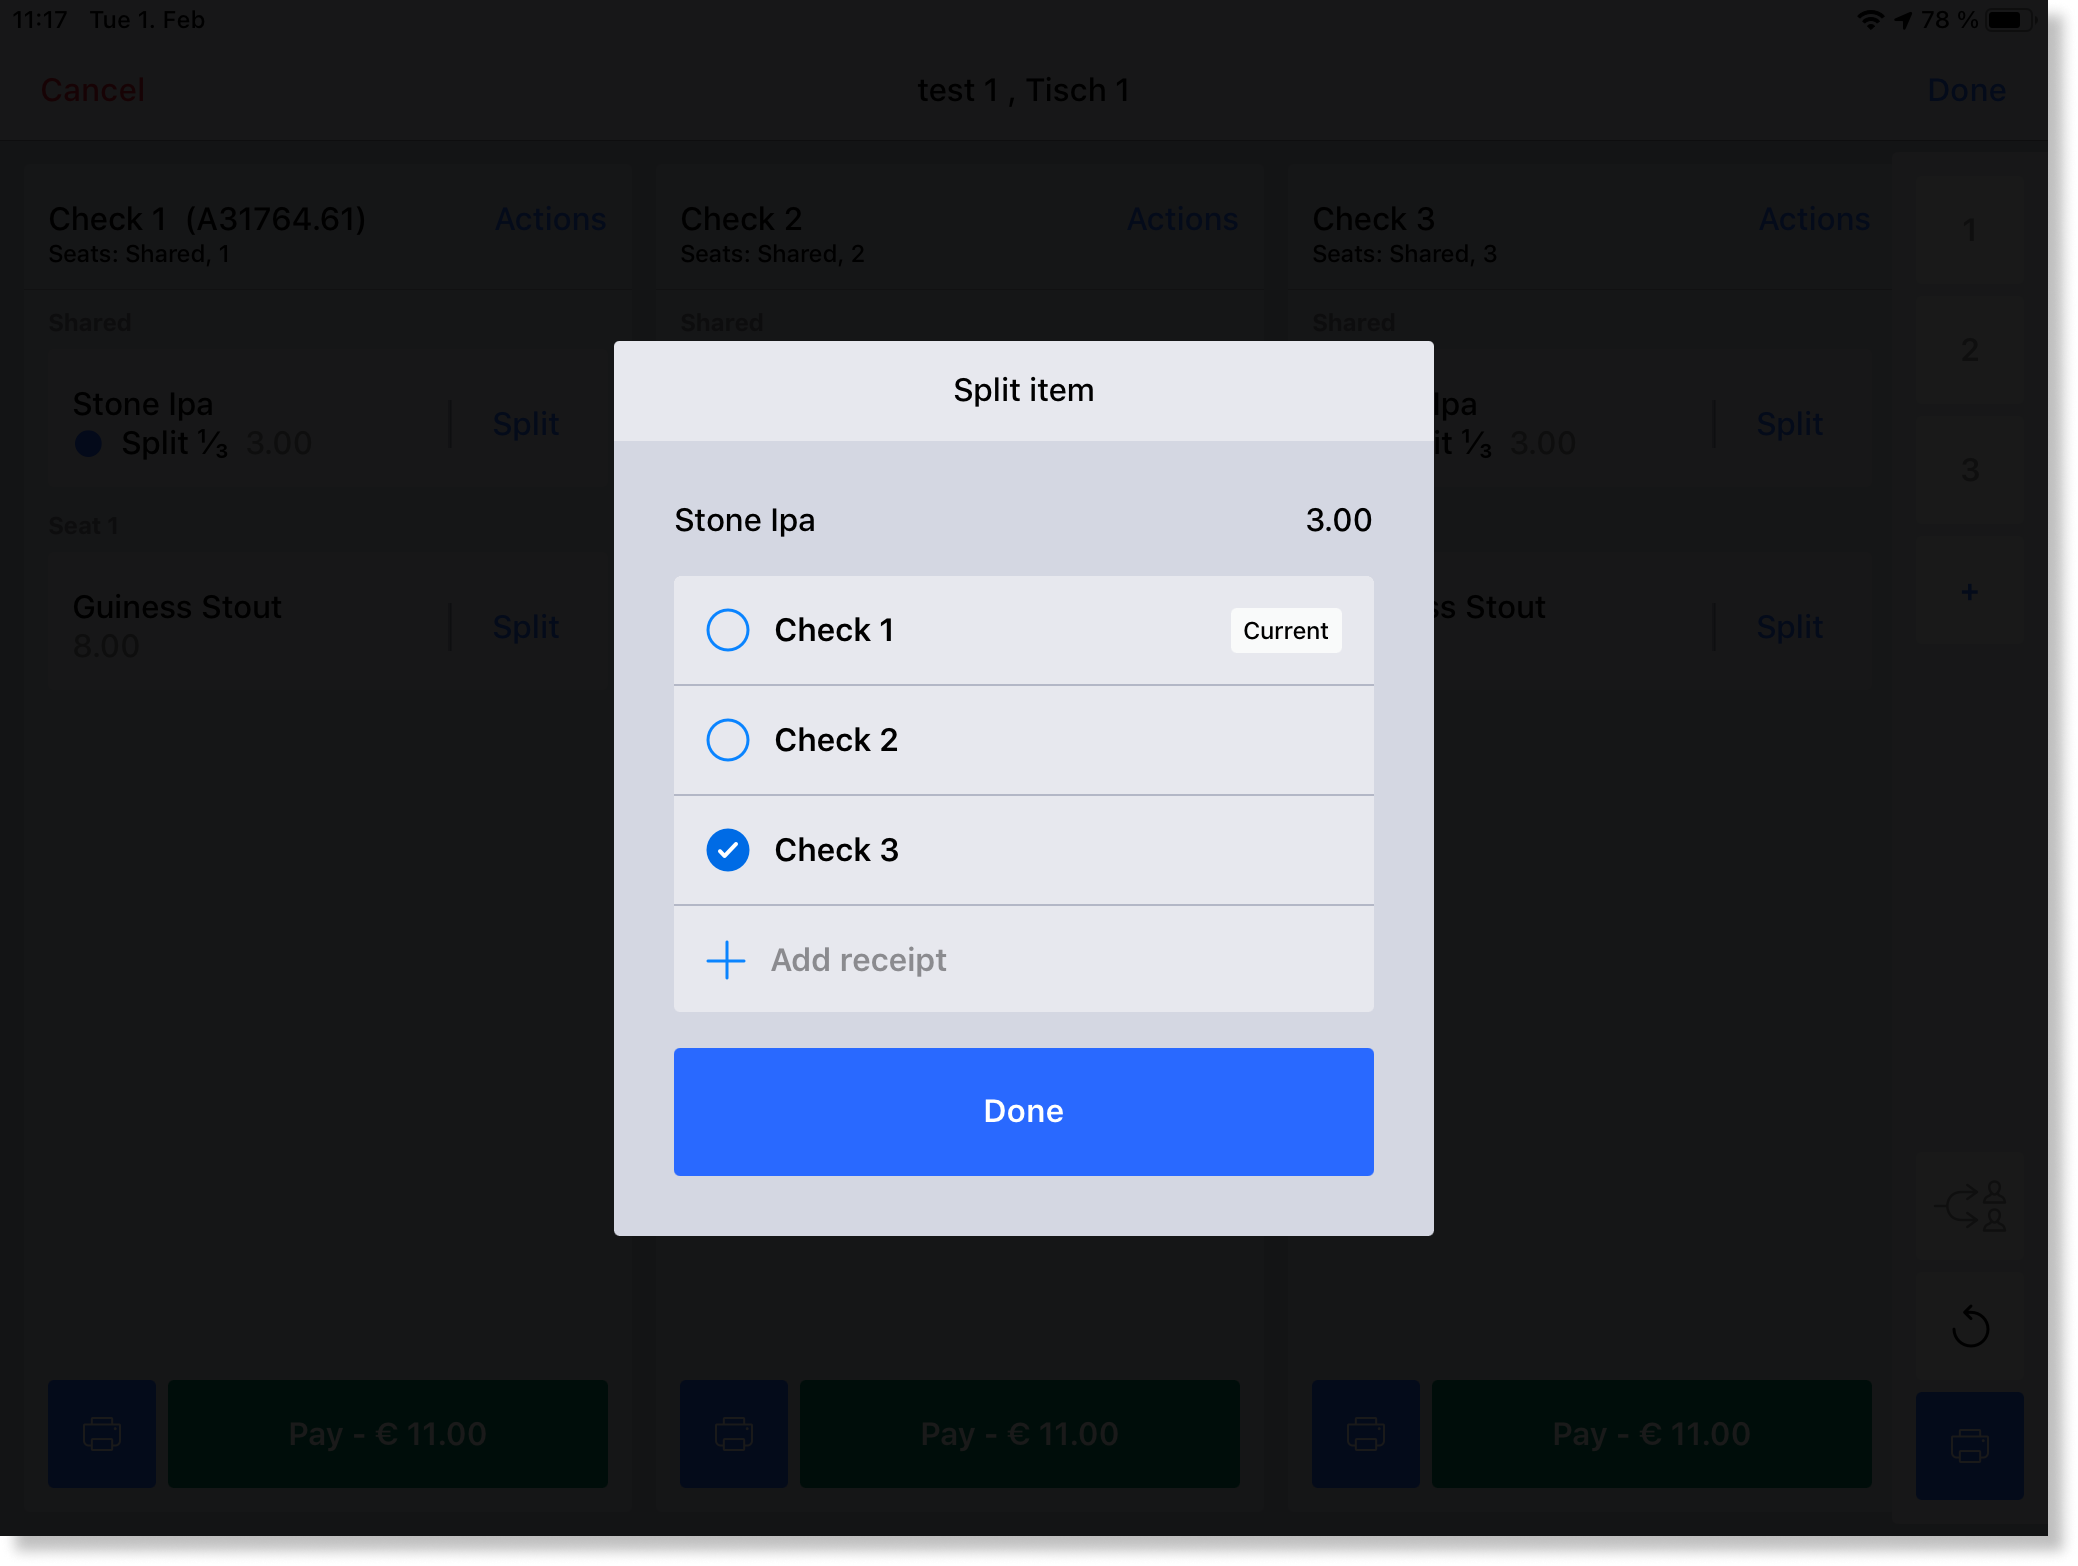
You can also split individual order items from the split check screen. Simply tap on an order item line that you wish to split. A Split item window will open, asking you to specify which checks this item should be split between. When you've selected all the checks this item should be split between, tap Done.
To undo a split item, select the split item to revert and then tap the original check.
If you ever make a mistake, you can always revert the checks to the original state (all order items combined). From the Split check screen, select the Undo icon on the bottom right of the screen.
Moving items between checks
If necessary, you can sort the item shares so that they are reassembled split items into a single item, and assign it to a specific check. There are two ways to do this.
Option 1
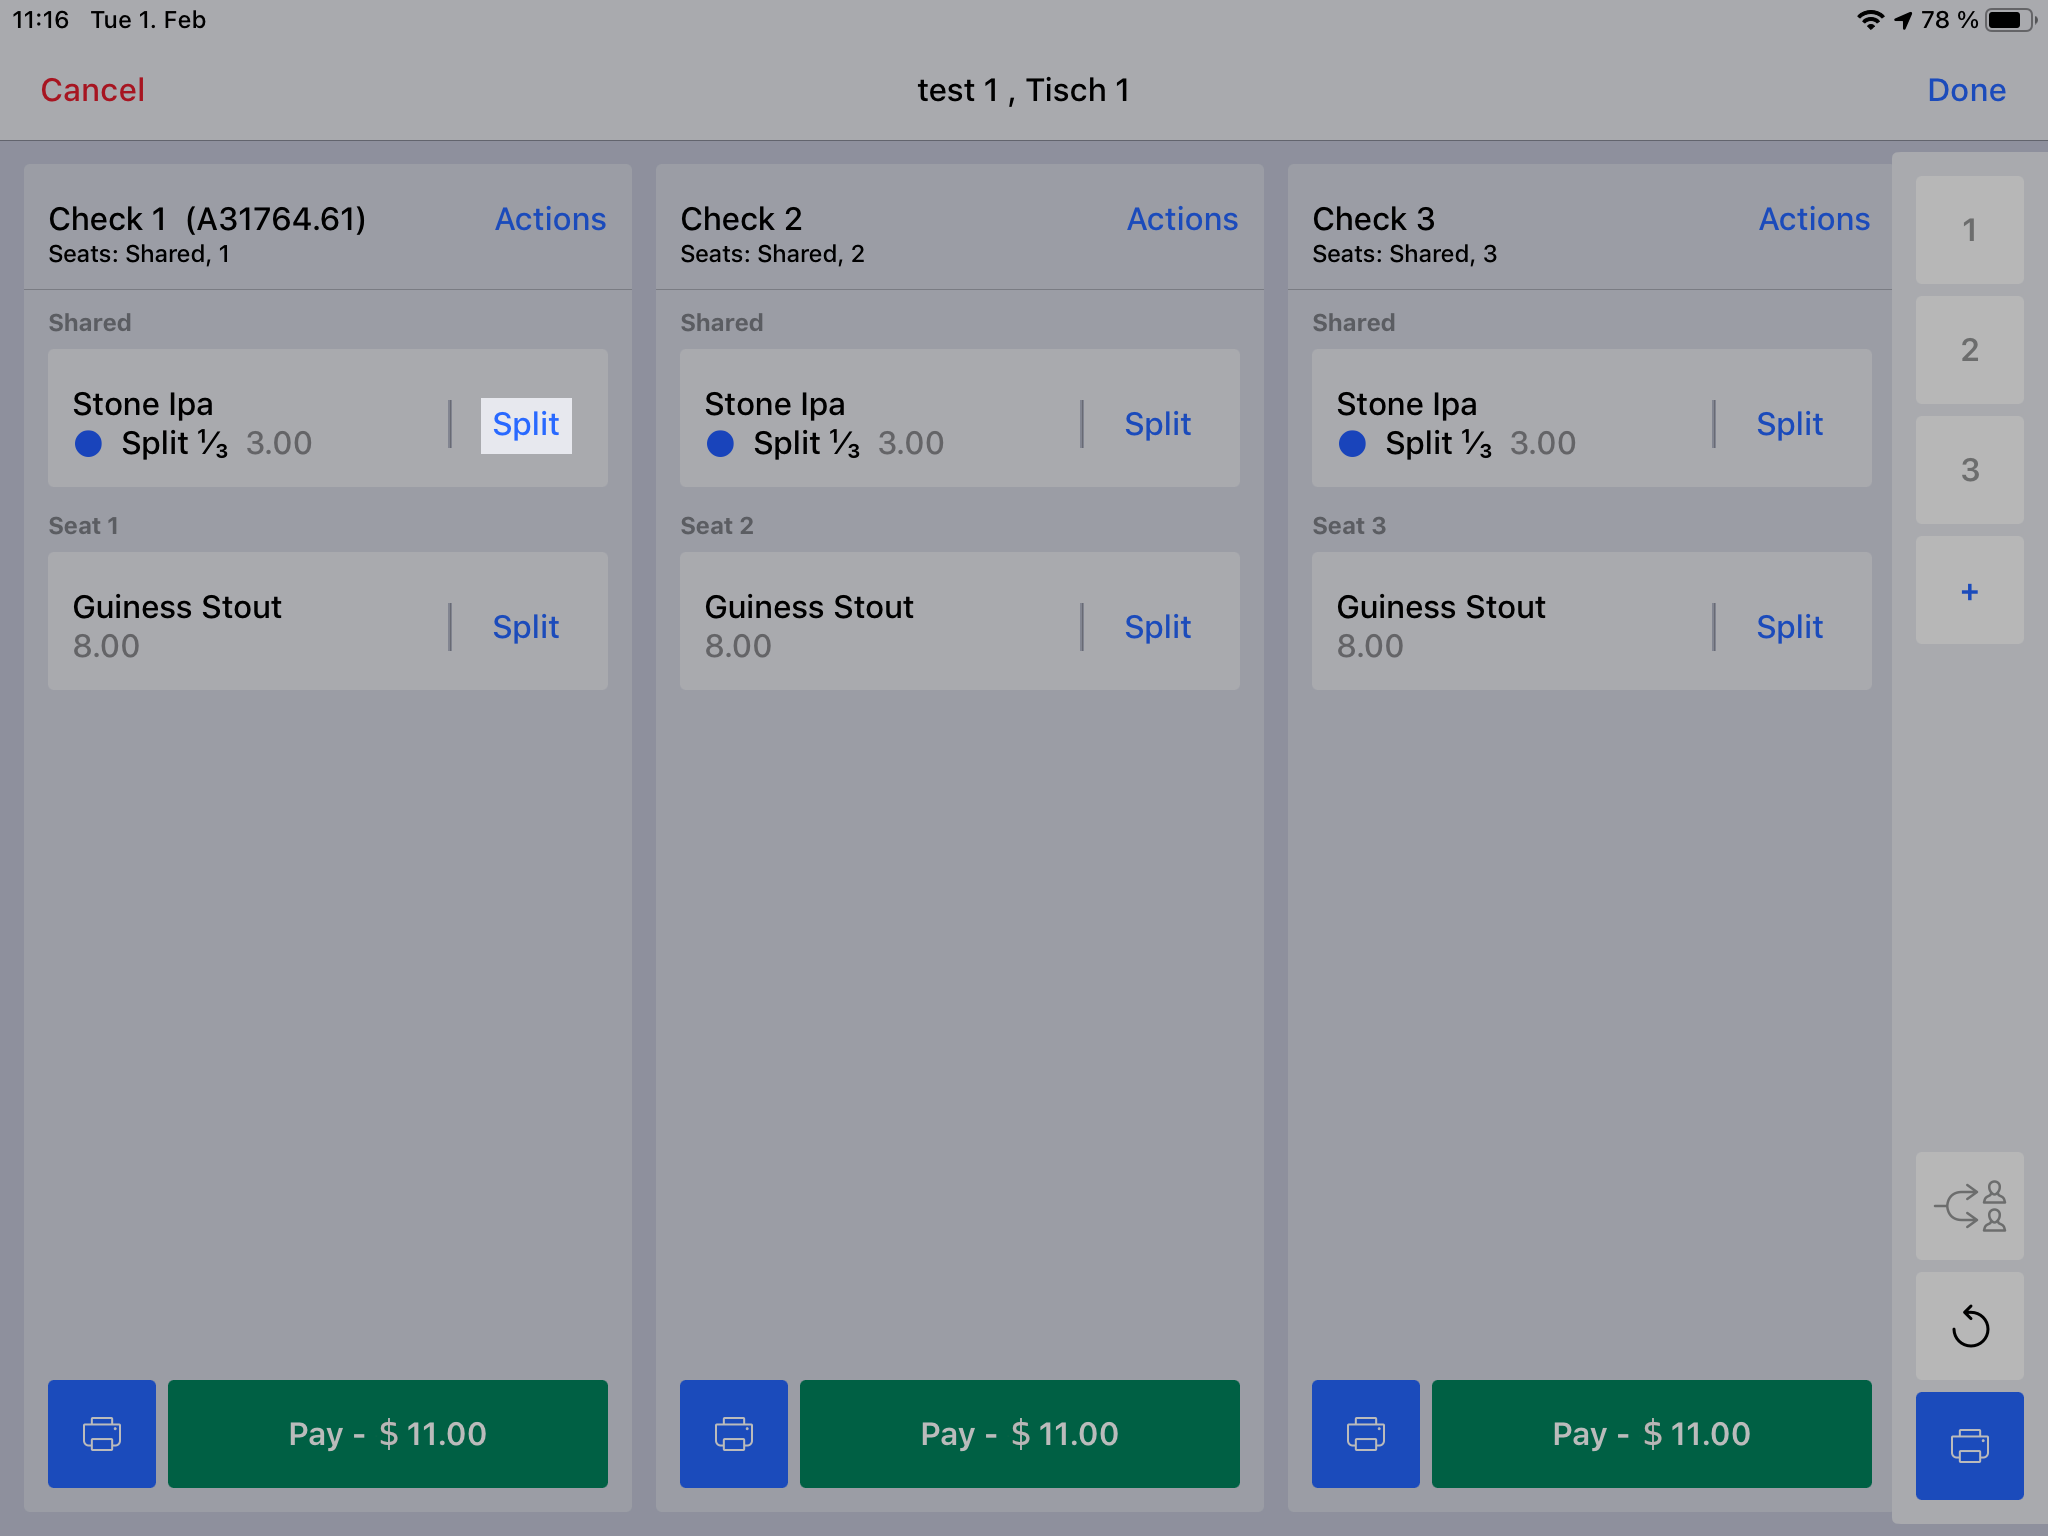
- Click on Split next to the item share you want to edit.
- Deselect the check which will not be paying for the item, and then select which checks will be paying instead.
- Repeat steps 1 to 2 for each check except the one containing the entire item article.
- Tap Done to confirm.

Option 2
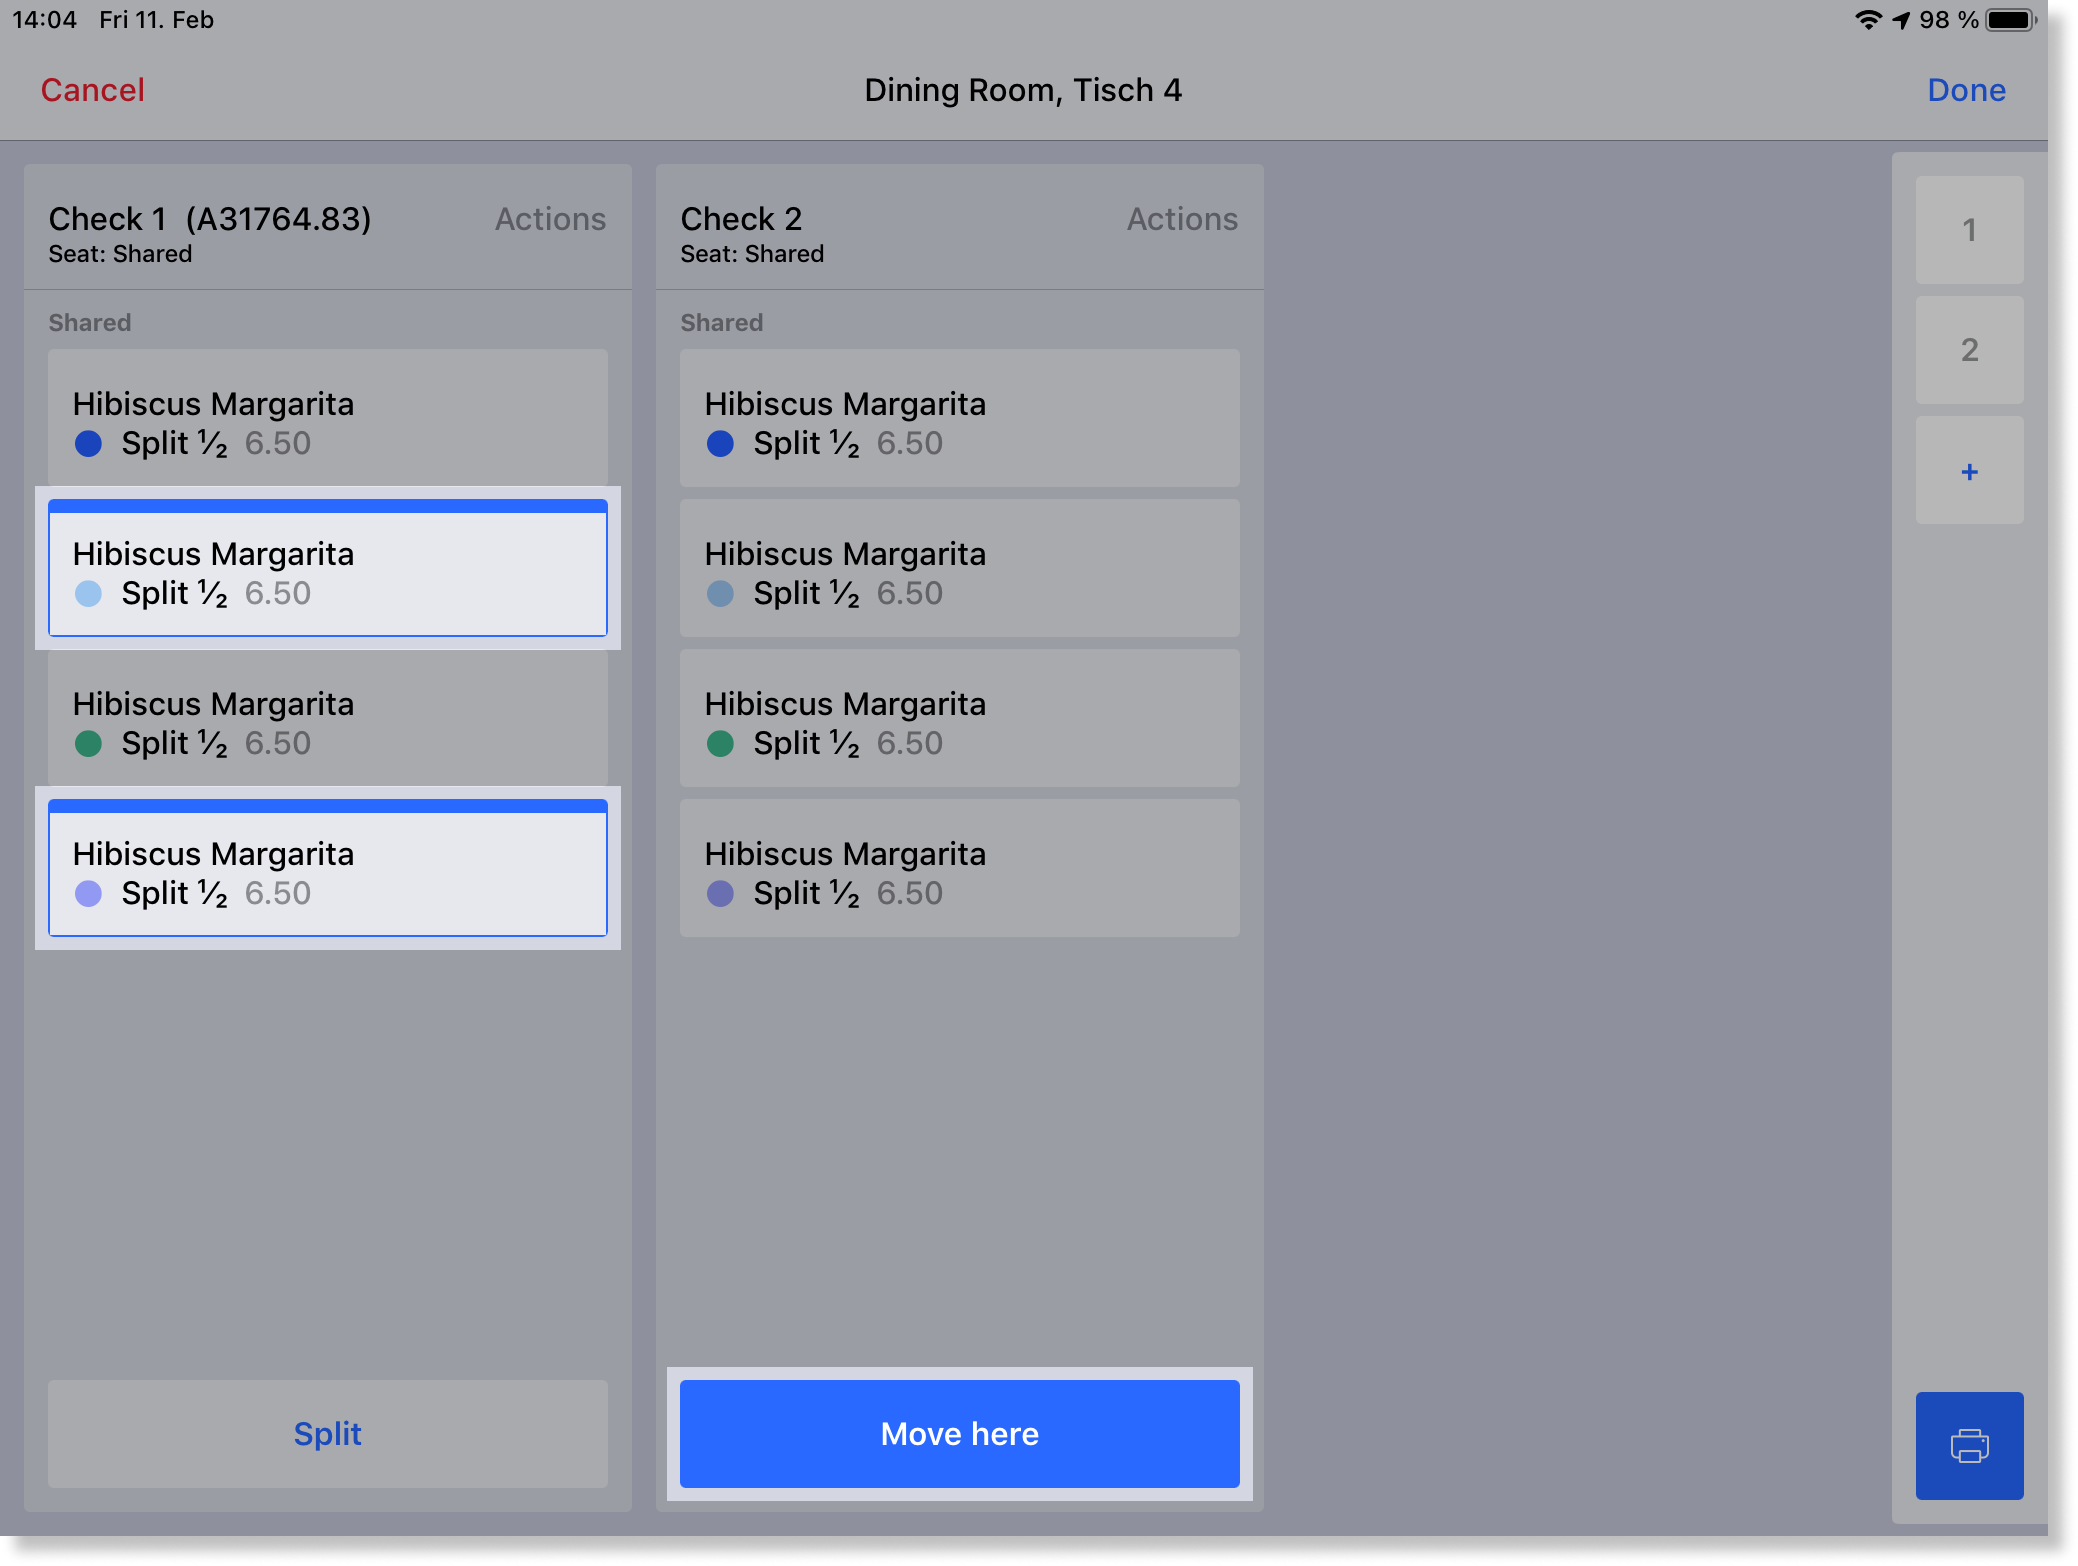
- Tap the item that you want to move.
Note: Checking more than one item is possible. - Tap Move here on the desired check to move the item here.
Adding items to already split checks
Once you have split the checks, you can always return to the Register screen and add more items. When returning to the Register screen after splitting the checks, you'll notice the order view reflects the divided bills. At the top of the Order view, you can select which check you wish to view or edit.
What's next?
Editing and voiding receipts
Learn how to edit and void receipts with Lightspeed POS.
Editing receiptsEmailing customer receipts
Learn how to email customer receipts with Lightspeed POS.
Emailing receipts