The GreenBill integration requires the GreenBill Box and an existing GreenBill account. If you have not created your GreenBill account yet, visit GreenBill to get started.
Note: Your login credentials will be emailed to you. When logging in for the first time, you will be prompted to confirm your email address and change your temporary password.
Table of contents
- In the box
- Physical setup
- Enabling the GreenBill integration
- Enabling customer-facing display options
- What's next?
In the box
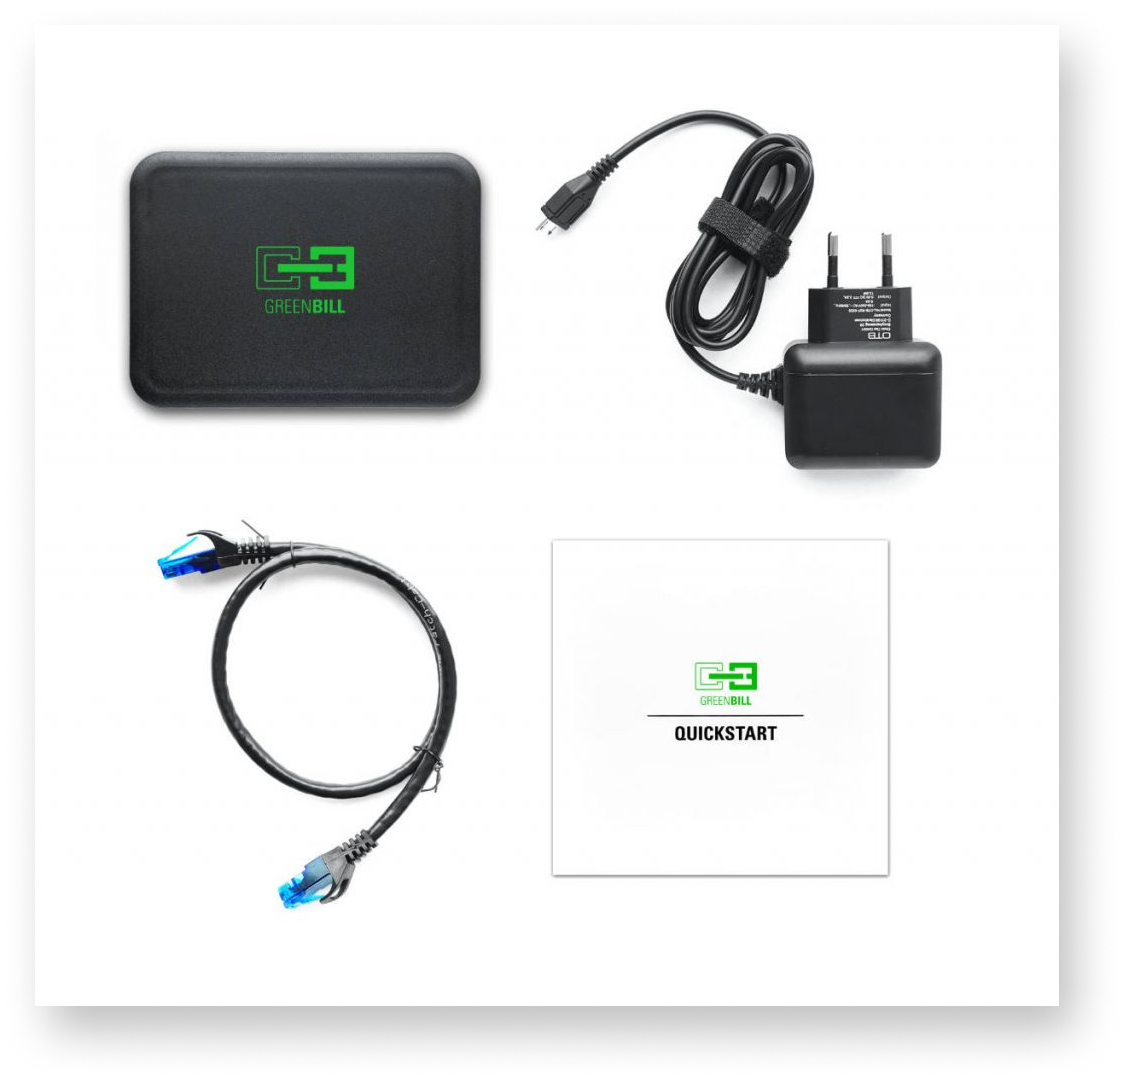
- GreenBill Box
- Power cable
- Ethernet cable
- Quickstart manual
Physical setup
Before you can add the GreenBill Printer to Lightspeed POS, the printer needs to be powered on and configured.
- Plug the power cable into the micro USB port on the bottom of the GreenBill Box. Plug the other end into an outlet.
- Plug the ethernet cable into the ETH port on the side of the GreenBill Box. Plug the other end into your router.
- Once powered on, the GreenBill Box will automatically connect to the internet and establish a connection via DHCP.
Enabling the GreenBill integration
Adding the GreenBill digital printer to Lightspeed Restaurant
- Log in to the Back Office with your Lightspeed Restaurant credentials.
- Log in to the GreenBill backend using your GreenBill credentials.
- In GreenBill, click Data sources.
- Confirm that the ID of the printer in GreenBill matches the ID on the back of your GreenBill box.
- Click Settings and write down the IPv4 address.
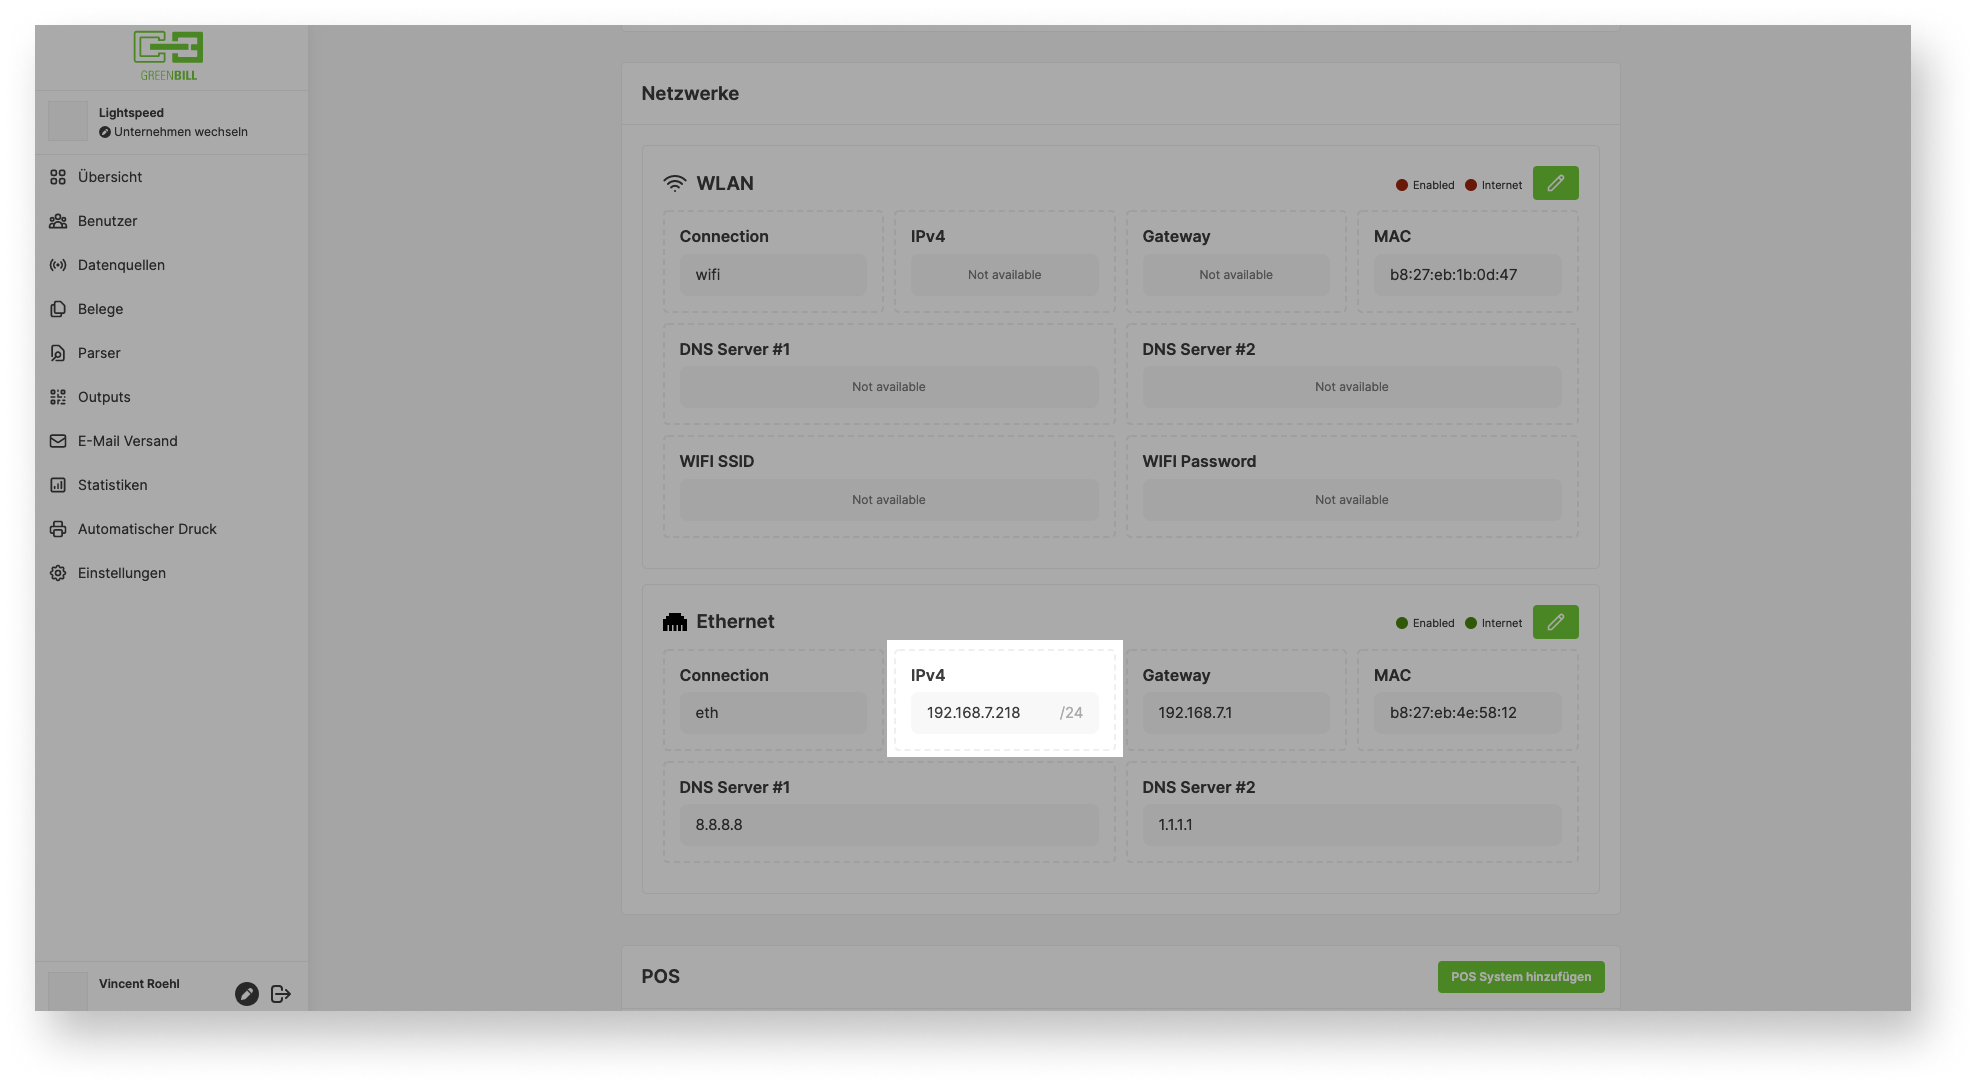
- Once you have the IP address of the GreenBill Box, add it as a printer in Lightspeed:
-
Navigate to the Back Office of Lightspeed POS.
-
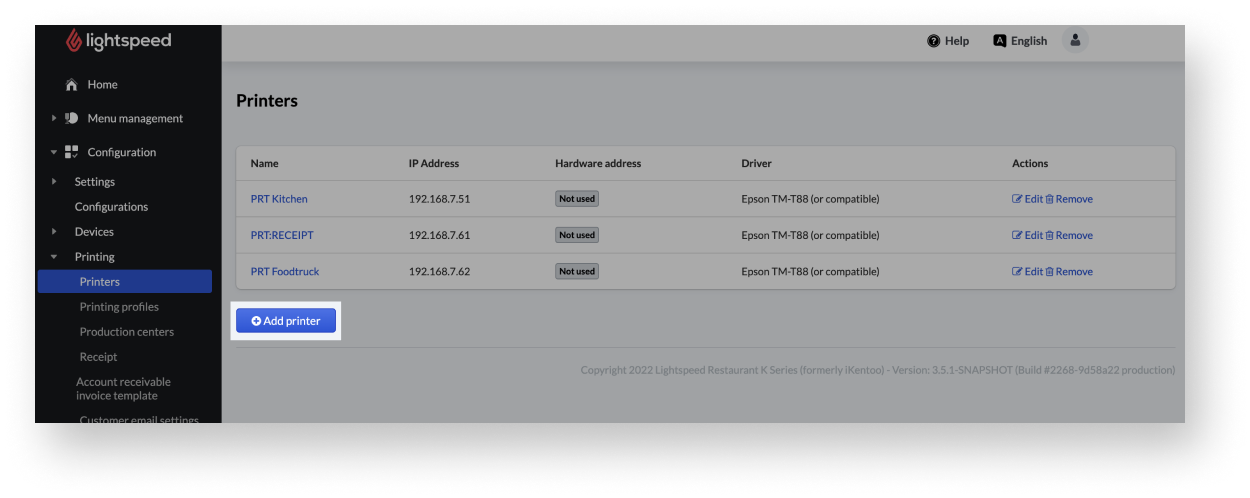
Click Configuration > Printers.
-
Click Add printer.
-
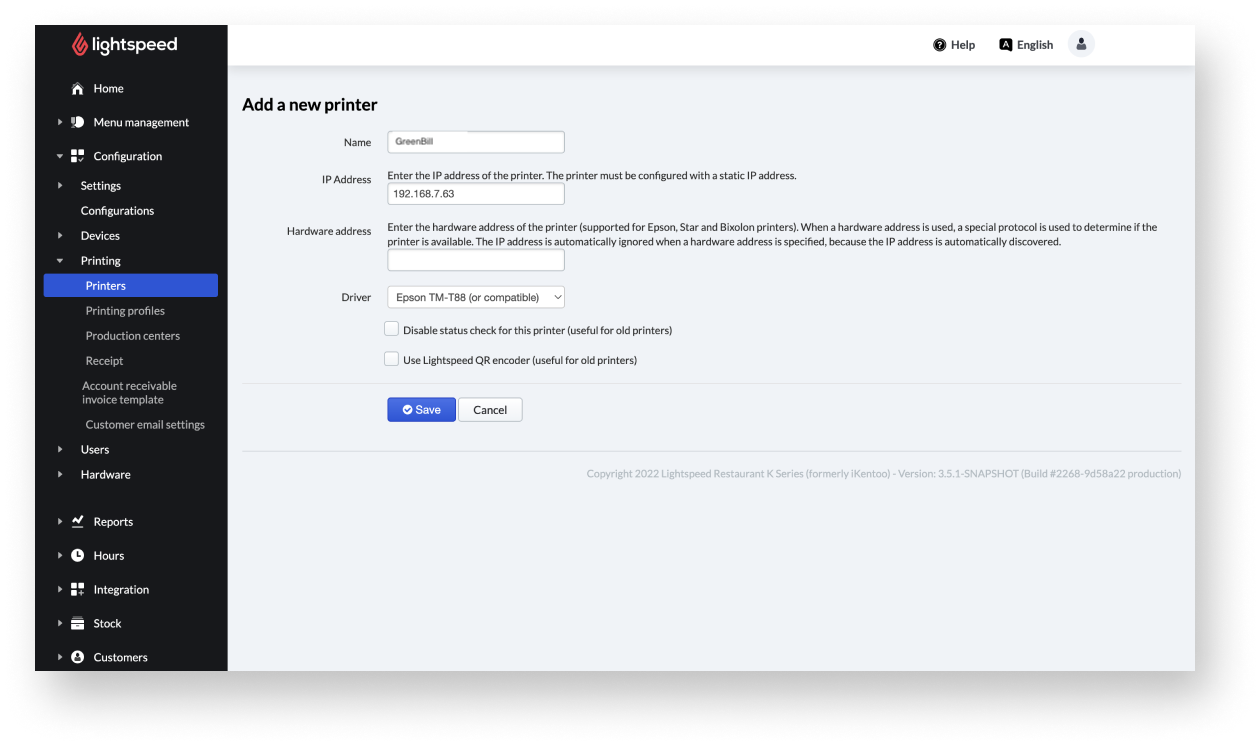
Under Details, fill in the following:
Name: GreenBill
IP address: Enter the IP Address as it appears in GreenBill
Driver: Epson -
Click Save.
-
Adding your thermal printer to GreenBill
After the GreenBill printer is saved in Lightspeed Restaurant, edit your printer settings in GreenBill so that receipts are automatically sent to the GreenBill virtual printer before a physical copy is printed.
- First, retrieve the IP address of your thermal printer.
- Navigate to your Lightspeed Restaurant Back Office.
- In the Back Office, navigate to Configuration > Print > Printer.
- Select your current thermal printer.
- Copy the IP address of your thermal printer.
- In GreenBill, select Add printer. For connection type, select ETH.
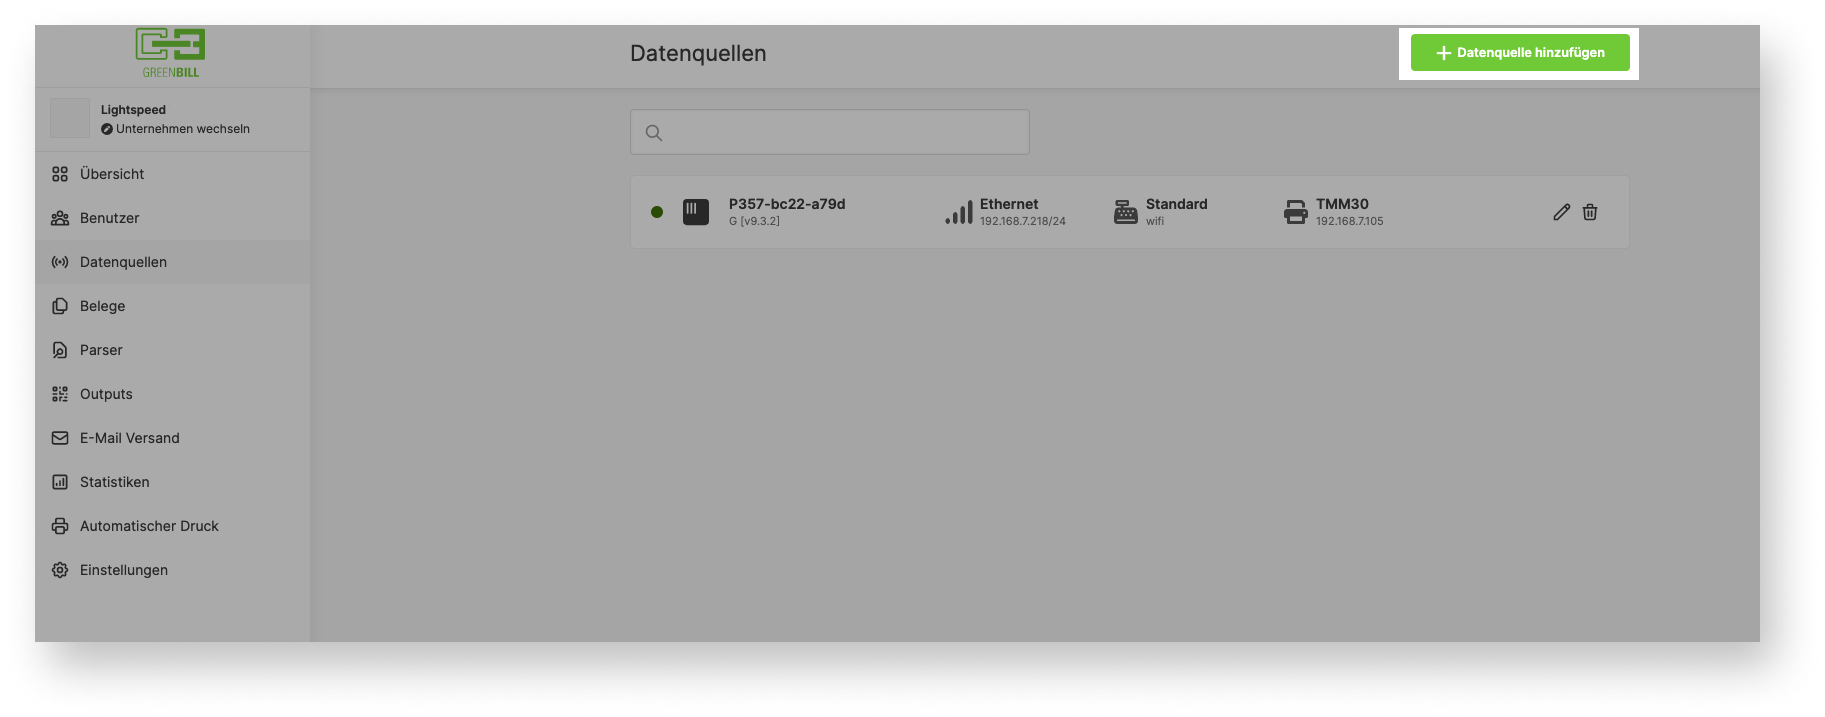
- Under Printer model, enter the model of your printer.
- Under IP address, enter the IP address of your printer exactly as shown in Lightspeed Restaurant.
- Click Save.
- Once the GreenBill initial setup is complete, open the Lightspeed POS app and print a test receipt by starting a new sale.
Note: By default, all receipts are sent to the GreenBill server and displayed digitally before they can be printed. If the GreenBill server is not available or if the GreenBill Box is disconnected from the internet, receipts will automatically print via your thermal printer.
Enabling customer-facing display options
GreenBill allows your customers to scan, save, or email a digital receipt, so you don’t have to print a physical copy. Depending on your business needs, you can either enable a dedicated electronic display or print a static QR code that can be scanned by your customers.
Any tablet or smartphone with internet access can be used as an electronic customer display. The electronic customer display works by accessing an encrypted website that is unique to your business, so you don’t need to install an app.
Customer Display
This display option allows you to set up a permanent, customer-facing screen that automatically updates with the last generated receipt.
- Open GreenBill backend.
- Click Outputs.
- Select customer display.
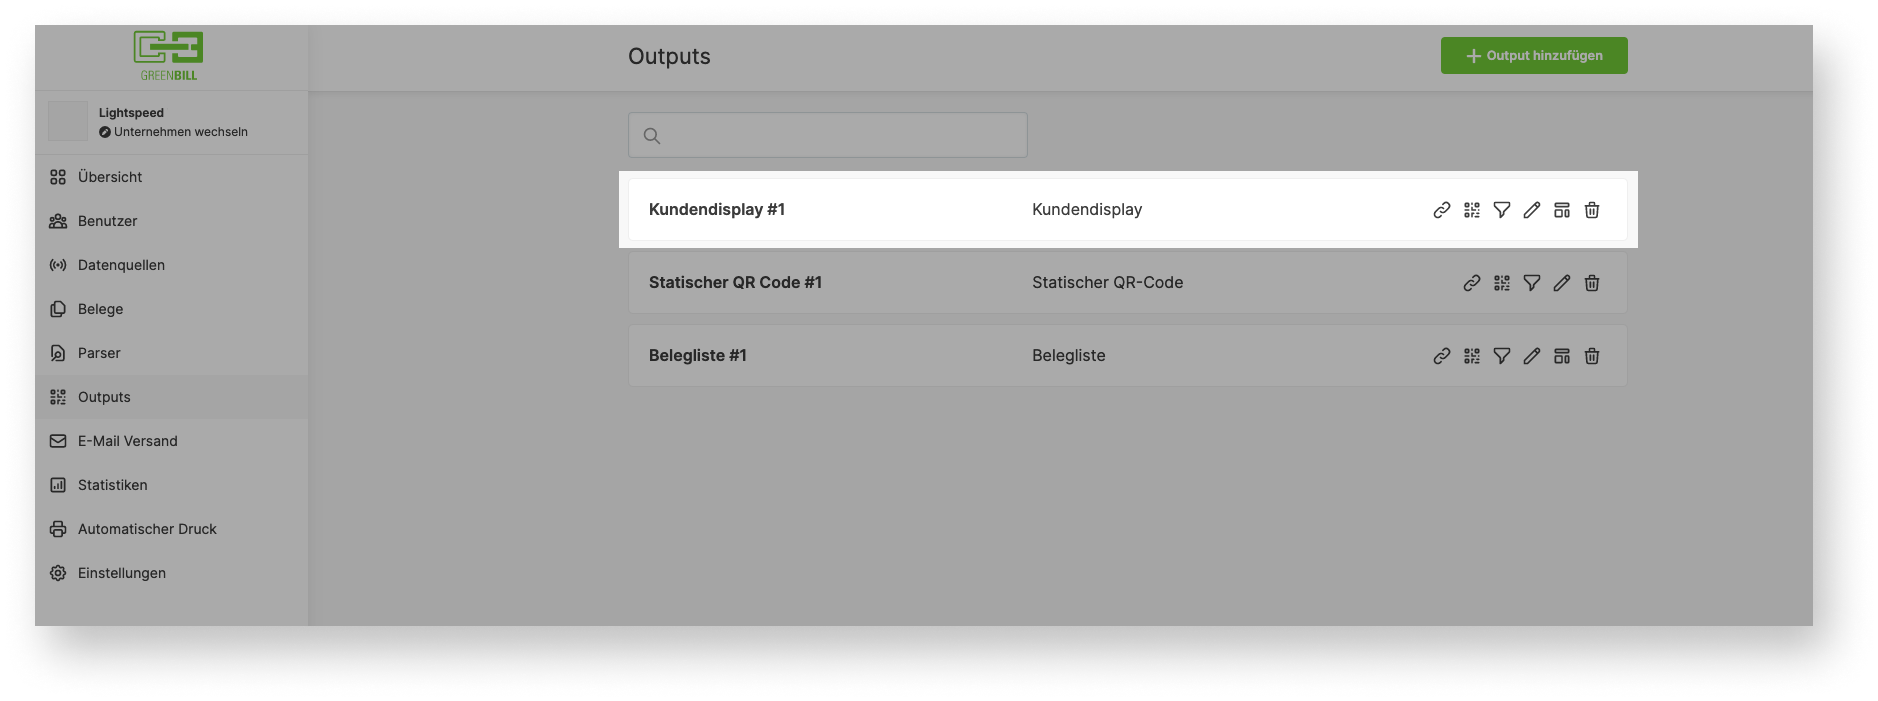
- Click the QR code icon to retrieve a scannable QR code and the access code for the encrypted website.
- Open the link by scanning the QR code with your electronic display device.
- Enter the access code provided in step 4 in the provided field.
- Once the encrypted website is launched, you can physically set up your device as a permanent customer-facing display.
Service List
This display option allows you to select and present a receipt to a customer using an electronic display.
- Open GreenBill backend.
- Click Outputs.
- Select service list.
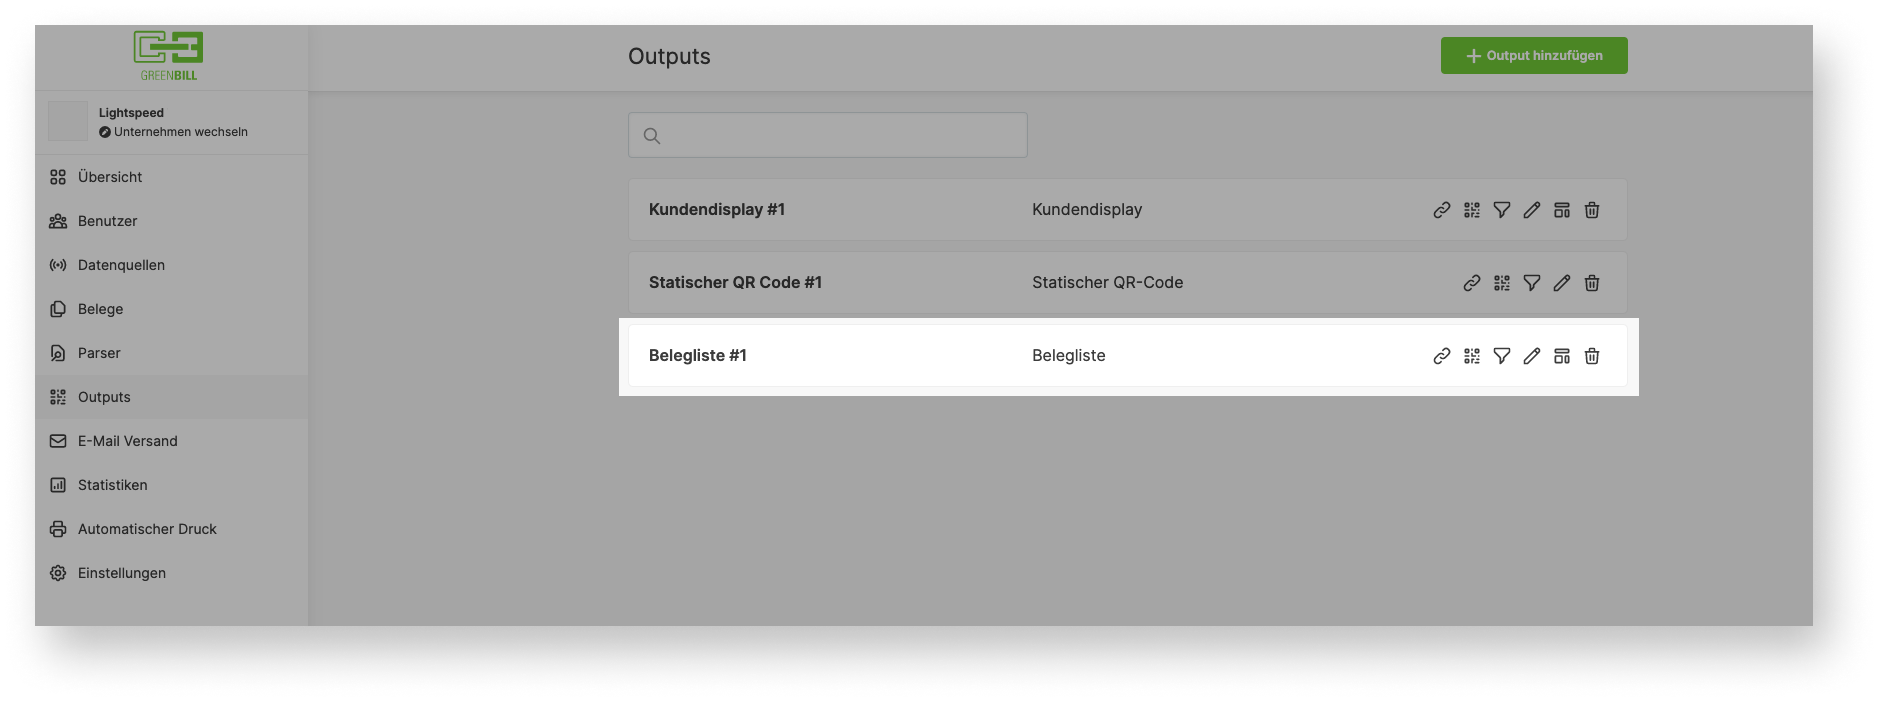
- Click the QR code icon to retrieve a scannable QR code and the access code for the encrypted website.
- Open the link by scanning the QR code with your display device.
- Enter the access code provided in step 4 in the provided field.
- Once the encrypted website is launched, use the data to open the desired receipt and display it to your guest.
Static QR
This display option allows you to download and print a QR code that your customers can scan with their mobile devices to access the last generated receipt. Unlike the other display options, you don’t need an electronic display for a static QR code.
- Open the GreenBill backend.
- Click Outputs.
- Select Static QR code.
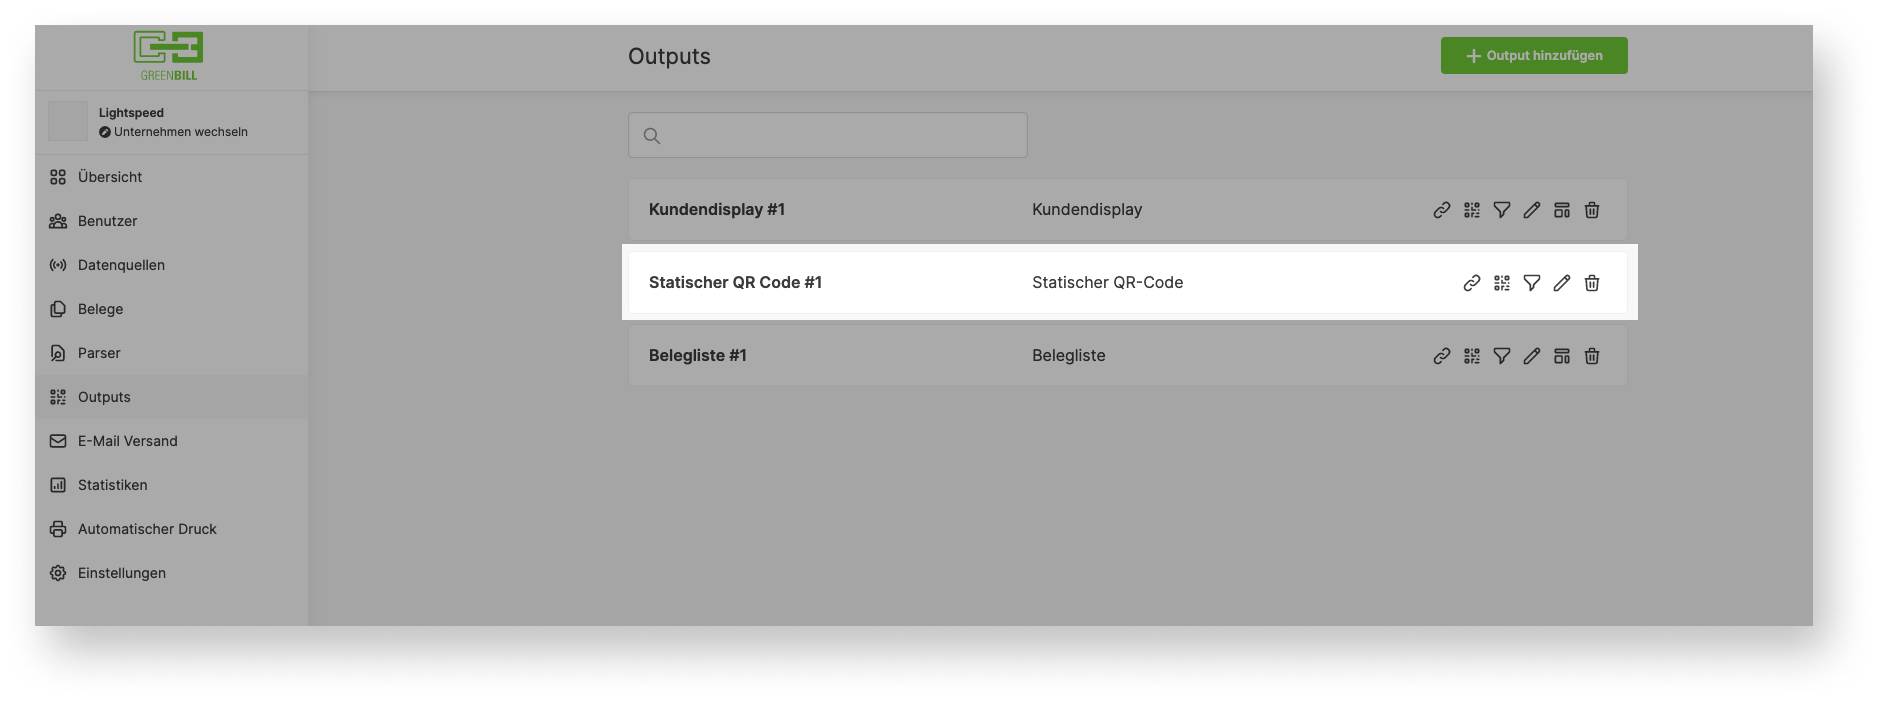
- Click the QR code icon.
- Right-click the QR code to download it as an image.
- Print the QR code image and display it in the customer area for customers to scan with their mobile devices.
What's next?
Use the GreenBill backend to manage display options, configure receipts, and customize your settings. These customization options are managed directly in GreenBill. For more information, contact GreenBill Support.